Your expert guide to renovating weatherboard homes in Melbourne. Learn step-by-step how to inspect, repair, and modernise your period home.
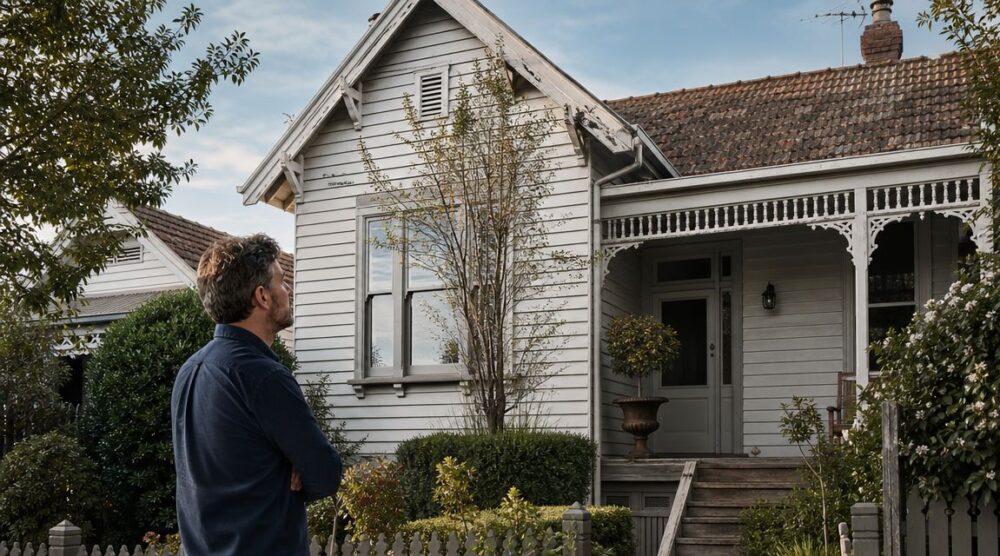
A lot of Melbourne homeowners start in the same spot. Standing at the front gate, the old weatherboard home still has the character that made you fall in love with it in the first place. The proportions feel right, the timber windows have charm, and the home sits comfortably within the streetscape. But a closer look tells a different story. Peeling paint reveals years of wear, sections of flooring feel soft underfoot, gutters struggle during heavy rain, and what first seemed like a simple refresh starts to look more like a substantial renovation project.
That's the reality of renovating weatherboard homes. The houses are often worth saving, but they rarely reward shortcuts. If you tackle the visible finishes first and leave the structure, moisture entry, services, and permits until later, the project usually gets more expensive and more frustrating.
The good news is that this kind of renovation becomes manageable once you put it in the right order. Melbourne weatherboards respond well to a methodical approach. Start with diagnosis. Deal with approvals early. Repair the bones properly. Upgrade comfort while the house is open. Then choose cladding, weatherproofing, and finishes that suit the house instead of fighting it.
Your Essential Guide to Renovating a Melbourne Weatherboard
If your house looks tired from the street but still has good bones, you're probably not deciding whether to renovate. You're deciding how far to go, what to fix first, and how to avoid making a mess of a good period home.

In Australia, this sits inside a very large established housing market. The Australian Bureau of Statistics reported 11.1 million private dwellings in the 2021 Census, and weatherboard homes are common in older suburban housing stock that now needs maintenance, repainting, insulation upgrades, and cladding repairs as part of ordinary renovation cycles (Australian Bureau of Statistics housing context). That matters because a weatherboard renovation isn't some niche heritage hobby. It's part of a broad maintenance economy where structural repair, moisture control, and energy performance often sit alongside cosmetic work.
What usually surprises first-time owners
The first surprise is that the outside rarely tells the full story. A neat façade can hide subfloor moisture, old wiring, patched-over rot, or framing movement around windows and doors.
The second surprise is that older Melbourne houses often need a split mindset. You have to respect the original character while still making the place work for modern living. That means preserving what gives the house identity, but not pretending old construction methods meet current expectations for comfort, safety, or durability.
Practical rule: Treat the project like a building repair job first and a decorating job second.
What a good renovation actually looks like
A good result isn't just fresh paint and straight new boards. It's a house that feels drier, quieter, more stable, and easier to heat, without losing the street appeal that made you buy it in the first place.
That usually means:
- Starting at the base: Check stumps, bearers, joists, drainage, and subfloor ventilation before touching finishes.
- Fixing water entry: Roof leaks, failed flashings, cracked sealants, and overflowing gutters do more damage than most owners realise.
- Opening walls strategically: Use the disruption to upgrade insulation, wiring, plumbing, and moisture management.
- Making selective exterior decisions: Repair original timber where it's worth saving. Replace failed sections where repair is false economy.
If you approach renovating weatherboard homes in that sequence, the job becomes clearer. You stop reacting to problems one by one and start building a proper plan from foundation to finish.
The Pre-Renovation Weatherboard Health Check
The biggest mistake with an old weatherboard is demolishing first and asking questions later. For weatherboard homes in Melbourne, the renovation sequence should start with a full defect survey of the envelope before any demolition. That means inspecting the foundation or subfloor, roof, wall linings, plumbing and electrical systems, then locking a written scope, timeline and budget so structural and service upgrades are planned before finishes.

Start underneath, not at eye level
Most owners begin with paint, boards, and windows because that's what they can see. Builders start underneath because movement and moisture usually begin there.
Walk the perimeter, then get under the house if there's safe access.
- Stumps: Look for settlement, cracking, tilting, or signs the floor line has dropped in one area.
- Bearers and joists: Check for moisture damage, fungal decay, past patch repairs, and timber that's been sistered in poorly.
- Subfloor ventilation: Poor airflow traps moisture. That shortens the life of framing and makes the whole house feel colder and damp.
- Drainage: Water pooling near footings or splashing back onto lower boards causes repeated failure.
If the floor feels springy, slopes noticeably, or doors are out of square, don't assume it's just an old-house quirk. It may be subfloor movement that needs proper investigation.
Check the envelope like a builder
Once the underside is assessed, move to the parts of the house that keep water out.
- Weatherboards: Look for cupping, splitting, soft spots, failed joints, and boards that have been filled repeatedly instead of replaced.
- Corners and trims: Timber often fails first at mitres, butt joints, and areas where water sits.
- Window sills and frames: Probe gently for softness. Sills cop the weather and often rot long before surrounding boards visibly fail.
- Roof and gutters: Rust, slipped roofing, blocked valleys, and overflowing gutters send water straight into wall cavities.
- Wall linings: Internal staining, bubbling paint, or musty odours often point to moisture entry from outside.
If you find one visibly rotten board, assume there may be more hidden damage behind it until proven otherwise.
Services need inspection before finishes
Old weatherboards often hide service problems that only become obvious during renovation. That's why the early check has to include more than timber.
- Electrical: Old switchboards, limited power points, and outdated wiring become a problem once walls are opened.
- Plumbing: Leaks in wall cavities, old supply lines, and poor bathroom waterproofing can mimic external moisture entry.
- Ceilings and roof space: Insulation gaps, old penetrations, and signs of previous leaks matter before any lining work begins.
If termite risk is even slightly on your radar, get clear on what to expect from a termite inspection. It helps homeowners understand what inspectors look for, how access affects findings, and why timber damage shouldn't be guessed at.
Turn observations into a written defects list
The inspection only becomes useful when it turns into a document. Write down each defect, where it is, what trade is likely involved, and whether it affects structure, weatherproofing, services, or finishes.
If you're unsure who signs off what, a quick read on what a building surveyor does helps clarify where compliance and approvals fit into the process.
Your defects list should separate:
- Urgent structural issues
- Active water-entry points
- Pest-related damage
- Service upgrades
- Cosmetic items that can wait
That order matters. It's what stops a weatherboard renovation from turning into a series of expensive surprises.
Navigating Melbourne's Heritage and Permit Rules
A lot of Melbourne's weatherboard houses came out of the post-war building boom. That history is one reason councils often treat their renovation as conservation-sensitive work, with attention on preserving original façades while still upgrading thermal performance and moisture management (heritage context for Melbourne weatherboards).

That's why permit conversations can feel frustrating at first. You're not just dealing with construction rules. You're dealing with the fact that the house contributes to the character of the street, and council may want that character retained even when the building itself needs serious upgrading.
What heritage controls usually mean in practice
For most owners, the practical question isn't whether heritage matters. It's what parts of the job it affects.
Street-facing changes are usually where the scrutiny sits. Councils tend to care most about elements that alter the public presentation of the house, such as the façade, windows, verandah details, roof form, and visible cladding profile.
Internal work is often more flexible, but it still has to meet building requirements where structure, safety, and services are involved.
- Lower-risk work: Like-for-like painting and minor maintenance that doesn't change the appearance.
- Higher-scrutiny work: Replacing windows with a different style, changing cladding dimensions, altering roof shape, or changing the front elevation.
- Compliance-triggering work: Structural changes, major restumping, significant reframing, and some plumbing or electrical alterations.
Why owners get into trouble
The usual problem isn't bad intent. It's sequencing.
People get excited about demolition, order windows too early, or engage trades before they've confirmed whether council or a building surveyor needs to review the work. Once that happens, the project starts fighting itself. Materials are on order, trades are booked, and approval questions arrive late.
Preserve what gives the house its identity. Upgrade what makes it safe, dry, and comfortable.
A practical way to handle the paperwork
Start with the property information before design decisions become locked in. Check whether the site sits in a heritage overlay or other planning control, then talk through the likely scope with someone who understands both renovation and compliance.
The smartest approach is usually to prepare clear drawings and a scope that separates:
- Facade retention items
- Rear or internal changes
- Structural repair work
- Services upgrades
- Performance improvements such as insulation or moisture control
If your project sits in this space, it helps to look at examples of period home renovations in Melbourne where character and compliance need to work together.
Melbourne weatherboards usually renovate well when owners accept one basic truth. You're not dealing with bureaucracy for its own sake. You're dealing with a house type that carries local history, timber detailing, and a level of visual sensitivity that newer homes don't have.
Repairing Rot Termites and Structural Damage
Once the defects are identified, the job becomes much more direct. Stop water entry. Remove failed material. Repair the structure properly. Don't cover damage and hope paint will hold it together.

This is also the point where owners need patience. Expert guidance treats permit and pre-construction as a distinct phase. Before site works, confirm whether structural, plumbing, or electrical changes trigger approval requirements, and allow time for lead times and unexpected site conditions so demolition doesn't get ahead of approvals (permit and pre-construction guidance).
Rot repair has to go past the visible edge
Rot in a weatherboard house rarely stops neatly where the paint starts bubbling. It spreads where water sits, where end grain is exposed, and where failed flashings feed moisture into hidden timber.
Common repair areas include:
- Lower weatherboards: Especially near splash zones and garden beds.
- Window sills and jambs: These often fail before the surrounding wall does.
- Barge boards and fascia: Roof-edge timber cops repeated wetting and sun exposure.
- Subfloor framing: Poor drainage and low ventilation can gradually destroy structural timber.
The right repair depends on the depth and spread of damage.
- Localised failure: A single board or trim piece can often be replaced like for like.
- Joined-up damage: If rot has moved into studs, plates, or framing around openings, the repair becomes structural.
- Repeated failure: If the same area has been patched before, find the moisture source first. Otherwise the new timber will fail too.
Termite damage needs proof, not guesswork
Termites don't always leave dramatic signs on the surface. Often the timber looks intact until it's probed, cut back, or opened up.
Typical red flags include hollow-sounding timber, blistered paint, fine mud traces, distorted architraves, and sections that crumble instead of splitting cleanly. But you still need proper inspection and repair sequencing. Replacing damaged boards without resolving active termite pathways is wasted money.
Site reality: Cosmetic repair before pest and structural repair usually means doing the job twice.
Know when the fix stops being a carpentry-only job
Some problems sit within ordinary repair work. Others need engineering input or deeper structural planning.
Bring in a structural professional when you see:
- Sagging floors across multiple rooms
- Cracks that keep reopening after patching
- Out-of-plumb walls
- Roof spread or framing distortion
- Extensive stump or bearer movement
A carpenter can replace timber well. But when the house has moved, the repair has to address load paths, support, and sequencing. That might involve temporary propping, restumping, re-levelling, or rebuilding sections in a controlled order.
Repair methods that usually work best
For old weatherboards, durable repairs tend to follow a few rules:
- Match profile where visible: New boards should suit the existing character if they're on a prominent elevation.
- Prime concealed faces where appropriate: Especially cut ends and vulnerable edges before installation.
- Use proper flashings: Timber isn't meant to be the water barrier on its own.
- Leave access where future inspection matters: Don't seal up high-risk zones blindly.
Good repairs don't chase perfection in every original line. They restore structural soundness, stop water getting in, and leave the house ready for the performance upgrades that come next.
Upgrading for Modern Comfort and Efficiency
When the walls and floors are open, that's the best chance you'll get to make an old weatherboard feel like a better house to live in. Miss that window, and the same improvements become slower, messier, and far more disruptive later.

A key challenge in older weatherboard homes is improving thermal comfort without stripping character. In Melbourne, where heating demand is high, the primary decision often sits between repair, internal retrofit, or external re-cladding, with heritage sensitivity, condensation risk, and long-term running costs all in the mix (thermal comfort and character trade-offs).
Insulation is not the part to cheap out on
Many old weatherboards feel cold because they leak air and have very little effective insulation in the places that matter. Once linings come off, you can address the weak points properly.
Focus on:
- Ceilings: Heat loss through the top of the house is hard to ignore in winter.
- External walls: Even a modest wall upgrade can change how rooms feel near windows and outside walls.
- Subfloors: Insulating below suspended timber floors often improves comfort more than owners expect.
- Air sealing: Gaps around penetrations, skirtings, and frames can undermine otherwise decent insulation work.
The goal isn't to stuff every cavity with product and hope for the best. The goal is a system that suits the wall build-up, allows the house to manage moisture sensibly, and doesn't create condensation trouble inside the assembly.
Character can stay, but the build-up has to make sense
Owners often worry that better performance means losing the period feel. It doesn't have to.
You can usually retain visible heritage elements while improving what sits behind them. Original architraves, skirtings, windows, and façade details can stay, while the hidden layers do the hard work.
That's where product choice matters. Insulation advice from other climates can still be useful conceptually, especially around moisture and air movement. For example, discussions on how to combat South Florida humidity with insulation can help homeowners think more carefully about sealing, condensation, and where different insulation approaches do or don't make sense. The climate isn't the same, but the building-science logic still matters.
Comfort upgrades should protect the house as well as warm it. If insulation traps moisture in the wrong place, you haven't improved the building.
Do the services while access is good
Open walls are also the right time to modernise services. Waiting until after plaster, trim, and paint are complete is one of the most expensive forms of hesitation.
Use the access to review:
- Electrical layout: Add power points where people use them. Update old wiring and switchboard issues.
- Lighting positions: Old homes often have poor light distribution. Fix it while cabling is accessible.
- Plumbing lines: Replace tired pipework where bathrooms, laundries, or kitchens are already being opened.
- Exhaust and ventilation: Wet areas need reliable extraction, especially in tighter, better-insulated houses.
A weatherboard renovation should leave the home feeling different in winter mornings, on windy nights, and during a long damp spell. If the walls are open and the house still goes back together with weak insulation, old wiring, and no moisture strategy, that opportunity is gone for years.
Choosing Cladding Weatherproofing and Finishes
By this stage, the house should be structurally sound and dry enough to build forward with confidence. Now you decide what the exterior skin will do. Keep original timber where possible, replace failed sections, or re-clad larger areas if the repair burden has become too high.

That decision matters because weatherboard work in Melbourne sits inside a much bigger maintenance cycle. With over 11.1 million private dwellings nationally, and weatherboard common in older suburbs, these renovations are part of a broad pattern of upkeep that often combines structural repair with energy and moisture performance upgrades, not just cosmetic freshening up (Australian housing maintenance context).
Repair or replace the existing boards
There isn't one correct answer for every Melbourne house. The right choice depends on how much original fabric remains sound, how visible the area is, and whether previous repairs have already compromised the wall.
Repair existing timber when
- The profile matters: Street-facing elevations often benefit from keeping the original look.
- The damage is localised: Scattered failed boards and trims are usually worth replacing selectively.
- The underlying framing is sound: Good structure behind the cladding makes board-by-board repair more viable.
- The owner accepts ongoing maintenance: Timber can look excellent, but it asks for proper upkeep.
Consider broader replacement when
- Failure is widespread: Repeated patches across large elevations usually become poor value.
- Past work is inconsistent: Mixed profiles, poor jointing, and bad fixing patterns can make the façade look messy.
- Moisture detailing is missing: If the wall needs better wrap, flashings, and cavity logic, opening larger areas may be the smarter path.
- Long-term maintenance is a key concern: Some owners want a more forgiving exterior system.
Timber and composite options
This choice is rarely just about appearance. It's about maintenance tolerance, durability expectations, and how closely the finished result needs to match the original house.
Baltic Pine
- Benefit: Closely suits many older homes in look and feel.
- Limitation: Requires disciplined painting and maintenance.
- Best use case: Character-sensitive repairs where authenticity matters.
Modern treated pine
- Benefit: More practical for many repair situations and easier to source for replacement work.
- Limitation: Still timber, so it still needs coating maintenance and careful detailing.
- Best use case: Owners who want a traditional painted weatherboard outcome without chasing reclaimed material.
Fibre cement style cladding such as HardiePlank
- Benefit: Lower upkeep in many settings and consistent profiles across large replacement areas.
- Limitation: It won't always satisfy owners or councils who want genuine timber character.
- Best use case: Side or rear elevations, or broader re-cladding where maintenance reduction matters.
Weatherproofing is where good renovations separate themselves
The boards you see aren't the whole weatherproofing system. The hidden layers matter just as much.
A durable wall assembly usually needs attention to:
- Wall wrap or sarking: Choose a vapour-permeable approach where the build-up calls for it.
- Window flashing: Head flashings, sill treatment, and side sealing details are essential.
- Door thresholds: These fail constantly when levels, flashings, and sealant junctions are handled poorly.
- Penetrations: Meter boxes, taps, vents, and light fittings all need careful detailing.
A weatherboard wall should shed water in layers. Paint is the finish coat, not the primary defence.
Getting the paint system right
Paint doesn't rescue bad prep. On weatherboards, prep is most of the job.
Use a straightforward sequence:
- Wash the surface: Remove dirt, chalking, cobwebs, and contaminants.
- Strip loose coatings: Don't paint over unstable edges and expect a long life.
- Repair and fill selectively: Use fillers where appropriate, but don't sculpt rotten timber into shape.
- Prime bare areas properly: Especially end grain, cut edges, and repaired sections.
- Choose the finish for movement: Weatherboards expand and contract. The coating system needs to handle that.
Good finishes still depend on maintenance. South and west elevations age differently. Areas near gardens and downpipes usually need more attention than broad, sheltered wall runs. If you treat the exterior as an ongoing protective system instead of a one-off paint job, the renovation will last longer and look better doing it.
Managing Your Budget Timeline and Trades
Old weatherboards punish loose project management. The work is too interconnected for that. If one decision slips, three trades can end up waiting, materials arrive at the wrong time, and the budget starts leaking money in small, avoidable ways.
The best way to stay in control is to organise the job around decisions and dependencies, not around enthusiasm.
Build the budget around known risk
A budget for renovating weatherboard homes should separate visible work from hidden work. Owners are usually comfortable pricing windows, paint, kitchens, and bathrooms. The harder part is allowing for what only becomes clear after opening up.
Set your budget in layers:
- Fixed known scope: Items already confirmed through inspection and design.
- Likely repair items: Common problem areas such as hidden rot, framing repair, drainage correction, and service updates.
- Approval and consultant costs: Drawings, surveyor input, engineering where needed, and permit-related steps.
- Finish selections: Cladding profile, joinery, tapware, appliances, flooring, and paint system quality.
If your initial budget only covers the visible makeover, it isn't a renovation budget. It's a wish list.
Sequence the trades in the order the house needs
Trade sequencing should follow the building logic of the house. Not the availability of whoever answered the phone first.
A typical order looks like this:
- Inspection and documentation
- Design, scope, and approvals
- Demolition once approvals are in place
- Structural repair and framing
- Roofing, flashing, and external weatherproofing
- Electrical and plumbing rough-in
- Insulation and wall closure
- Linings, fix carpentry, and joinery
- Painting and final exterior completion
- Defect checks and maintenance handover
When owners swap that order around, they usually create rework. Painters end up waiting on carpenters. Plaster gets patched after electricians return. Freshly installed finishes get damaged by later repairs.
Choose trades who understand old houses
A weatherboard renovation is not the place for vague quoting and casual assumptions. You want trades who can identify what's original, what's failed, and what has to be rebuilt to meet current standards.
Ask practical questions:
- Have they worked on period or weatherboard homes before
- Do they explain what they'll repair versus replace
- Can they identify permit or compliance issues early
- Are they insured and appropriately licensed for the work they do
- Do their quotes describe scope clearly, including exclusions
If you need a benchmark for the kind of team usually involved, house renovation builders working across full-home projects can give you a sense of how integrated coordination should look.
Communication keeps small issues from becoming expensive ones
Old houses produce discoveries. That part is normal. The key is how those discoveries are handled.
Use a simple discipline:
- Document variations in writing
- Confirm material substitutions before ordering
- Keep a running defect and decision list
- Walk the site at agreed milestones
- Don't assume one trade has told the next trade what changed
The cleanest renovation jobs aren't the ones without surprises. They're the ones where everyone knows what changed, what it costs, and what happens next.
Once the work is finished, set a basic maintenance routine. Clear gutters, monitor painted timber, watch for movement around wet areas, and inspect any previously repaired zones after the first run of hard weather. A weatherboard house stays good because someone keeps paying attention to it.
If you're planning a weatherboard renovation and want experienced guidance from a Melbourne team that handles design, permits, structural repairs, and finish work as one coordinated project, talk to Smarter Home Renovations. They specialise in practical, well-managed renovations that respect period character while improving how the home performs day to day.