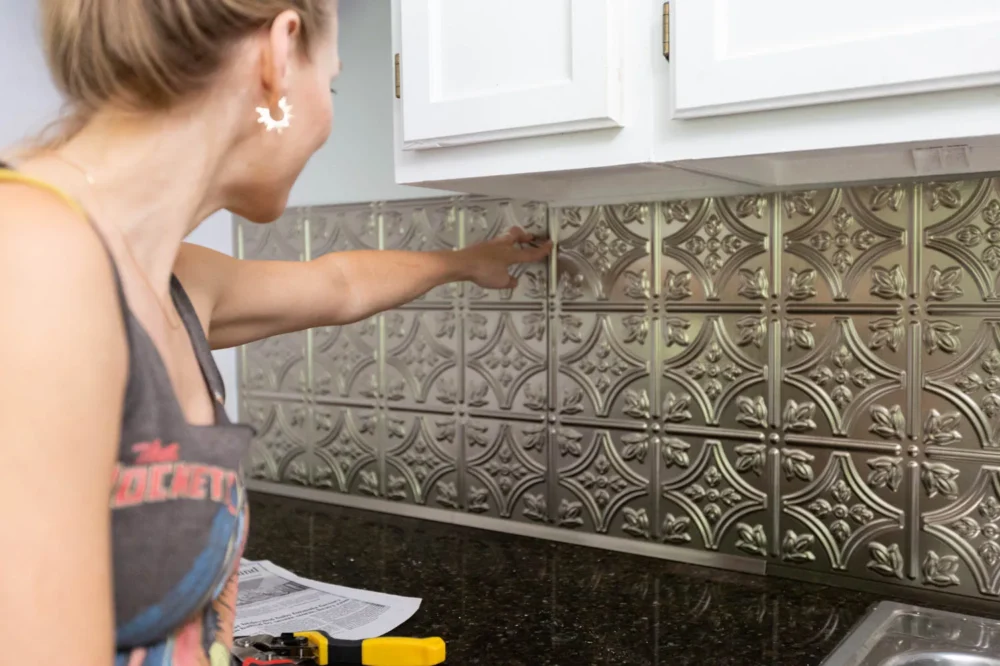
Discover the timeless appeal of pressed metal splashback. Learn about styles, costs, DIY installation, and design ideas for your home.
A pressed metal splashback is far more than just a functional kitchen feature; it's a piece of art that marries durability with stunning, embossed patterns. It acts as both a protective shield for your walls and a design statement, blending heritage charm with modern style. Think of it as architectural jewellery for your kitchen.

What Exactly Is a Pressed Metal Splashback?
Imagine a material that tells a story while protecting your walls from the daily reality of cooking splatters. That's the essence of a pressed metal splashback. It’s not just a practical surface, but a decorative panel typically made from lightweight aluminium that has been stamped, or 'pressed', with a repeating, three-dimensional pattern.
This isn't some new-fangled invention. It's a modern revival of a classic Australian design feature.
Originally, you wouldn't find these ornate panels in kitchens at all, but rather on the ceilings of grand Federation and Victorian homes.
They were a mark of elegance and craftsmanship, bringing texture and sophistication to a room. Today, we've simply repurposed that classic beauty for one of the hardest-working areas of the home.
The concept is quite straightforward:
- Functionality: It gives you a durable, water-resistant, and heat-resistant barrier behind your cooktop and sink.
- Aesthetics: The embossed patterns add a depth, texture, and unique focal point that flat surfaces like tiles or glass simply can't match.
- Versatility: It beautifully bridges the gap between different design eras, feeling just as at home in a sleek contemporary kitchen as it does in a classic period home renovation.
From Heritage Ceilings to Modern Kitchens
The journey of pressed metal in Australian architecture is a fascinating one.
These decorative panels first popped up around 1880, becoming a popular alternative to traditional plaster ceilings in homes and on shop awnings right up until the mid-1930s.
The golden era of pressed metal was largely driven by the iconic Wunderlich company, which produced countless beloved designs.
Today, this legacy is continued by companies that recreate these historic patterns on modern, high-quality metals perfectly suited for kitchen life.
You can discover more insights about the beauty of pressed metal and its history.
A pressed metal splashback is a nod to Australia’s architectural past, reimagined for contemporary living. It allows you to weave a piece of history into your kitchen in a way that is both practical and visually striking.
This unique blend of heritage and utility is what truly sets a pressed metal splashback apart. It offers a solution that is easy to clean, highly durable, and endlessly customisable. By understanding where it comes from, you can better appreciate its power to transform your kitchen from a purely functional room into a space with character, history, and style.
Choosing Your Perfect Pattern and Finish
This is where the fun really starts. Moving past the practicalities, you get to put your personal stamp on the kitchen. Selecting the perfect pressed metal splashback comes down to three key choices: the material, the pattern, and the finish. Nailing this combination is what elevates your splashback from a functional surface to the true heart of your kitchen's design.
Let's start with the foundation, the metal itself.
Selecting the Right Metal
While you might see a few different metals used, one really stands out as the go-to for Aussie kitchens.
- Aluminium: This is the undisputed champion for kitchen splashbacks. It’s light, tough as nails, and most importantly, it will not rust. That resistance to corrosion is a non-negotiable in a steamy, high-moisture space like a kitchen. It gives you longevity and complete peace of mind.
- Copper & Zinc: These materials have a unique, living beauty. Over time, they develop a natural patina, that soft, aged surface layer that adds incredible character. They're a fantastic choice for creating a warm, rustic, or industrial vibe, but they do need a bit more care to keep them looking their best.
For most homeowners, aluminium hits that sweet spot of practicality and aesthetic flexibility. It’s the perfect canvas for whatever pattern and finish you choose next.
Finding a Pattern That Speaks to You
The embossed design is what gives a pressed metal splashback its soul. The options are huge, from intricate designs that look like they've been lifted straight from a heritage home to crisp, contemporary lines. Think of it like choosing wallpaper, only with way more texture and resilience.
To make the choice a little less overwhelming, we can break the patterns down into a few key styles:
- Victorian & Federation: Perfect for period homes, these feature detailed florals, shields, and ornate flourishes that add a touch of authentic historical charm.
- Art Deco: Think bold geometric shapes, repeating fans, and strong, symmetrical lines. This style makes a dramatic statement in both modern and retro-inspired kitchens.
- Geometric & Modern: Clean lines, simple squares, hexagons, or fish-scale patterns deliver a contemporary look. They add texture without overpowering the space.
- Minimalist & Subtle: Designs with small, repeating motifs give you a gentle texture. It’s a great way to add depth and interest without being a loud focal point.
A quick tip on scale: A large, bold pattern can make a small kitchen feel grander, while a smaller, more intricate design adds a subtle elegance to a larger space. It’s all about balance.
Your choice is more than just about looks; it's about blending practical protection with artistic expression and a nod to architectural history.
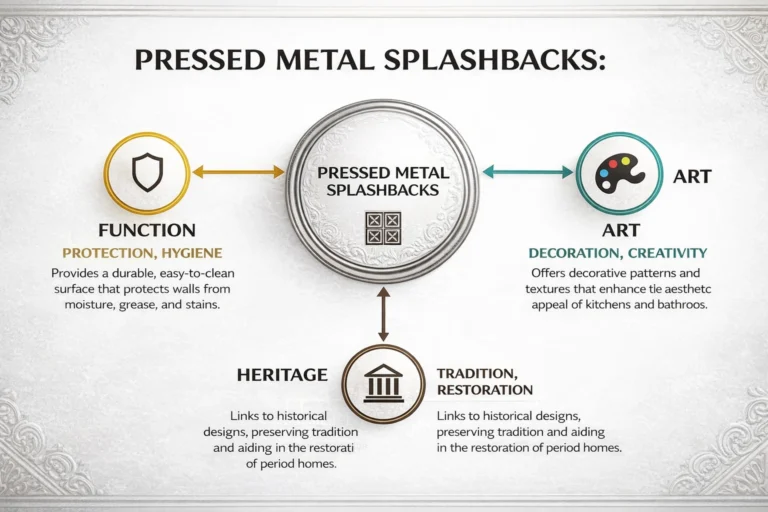
This map shows how these three elements, function, art, and heritage, all come together in your final choice.
Deciding on the Final Finish
The finish is the final layer of customisation that ties everything together. It dictates the colour, sheen, and overall mood of your splashback. While we're focused on pressed metal, it's always useful to know what's out there, and understanding other options like ceramic tile backsplashes can help round out your design perspective.
When it comes to pressed metal, these are the most popular routes:
- Raw Aluminium: This gives you an industrial, slightly rustic look. It’s a brilliant choice for a modern warehouse or loft-style kitchen, but it absolutely must be sealed with a clear coat to protect it from marks and make cleaning easier.
- Powder-Coated Colour: This is the most common and practical finish by a long shot. A tough layer of colour is baked right onto the panel, creating a durable surface that’s a breeze to clean. Popular choices like matte black, crisp white, or soft grey can integrate seamlessly with any cabinetry and benchtops you have in mind.
To help you weigh up the options, here’s a quick comparison of the materials and finishes available.
Material and Finish Comparison for Pressed Metal Splashbacks
This table breaks down the most common choices, giving you a side-by-side look at what makes each one unique. It covers everything from aesthetics and durability to how much care they need, helping you pinpoint the perfect fit for your home and lifestyle.
| Material/Finish | Best For | Maintenance Level | Relative Cost |
|---|---|---|---|
| Aluminium | Almost any kitchen style; ideal for high-moisture areas. | Low | $ |
| Copper | Rustic, industrial, or high-end traditional kitchens. | Medium to High | $$ |
| Zinc | Farmhouse, industrial, or heritage-inspired designs. | Medium | $$ |
| Raw/Clear Coat | Modern, loft, or industrial aesthetics. | Low (if sealed) | $ |
| Powder-Coated | Any kitchen style, from modern to traditional. | Very Low | $$ |
Ultimately, the right combination of material and finish depends on the look you're aiming for and how much maintenance you're prepared to do. For most people, powder-coated aluminium offers the best of all worlds: endless design choice with minimal fuss.
DIY vs Professional Installation: What to Know
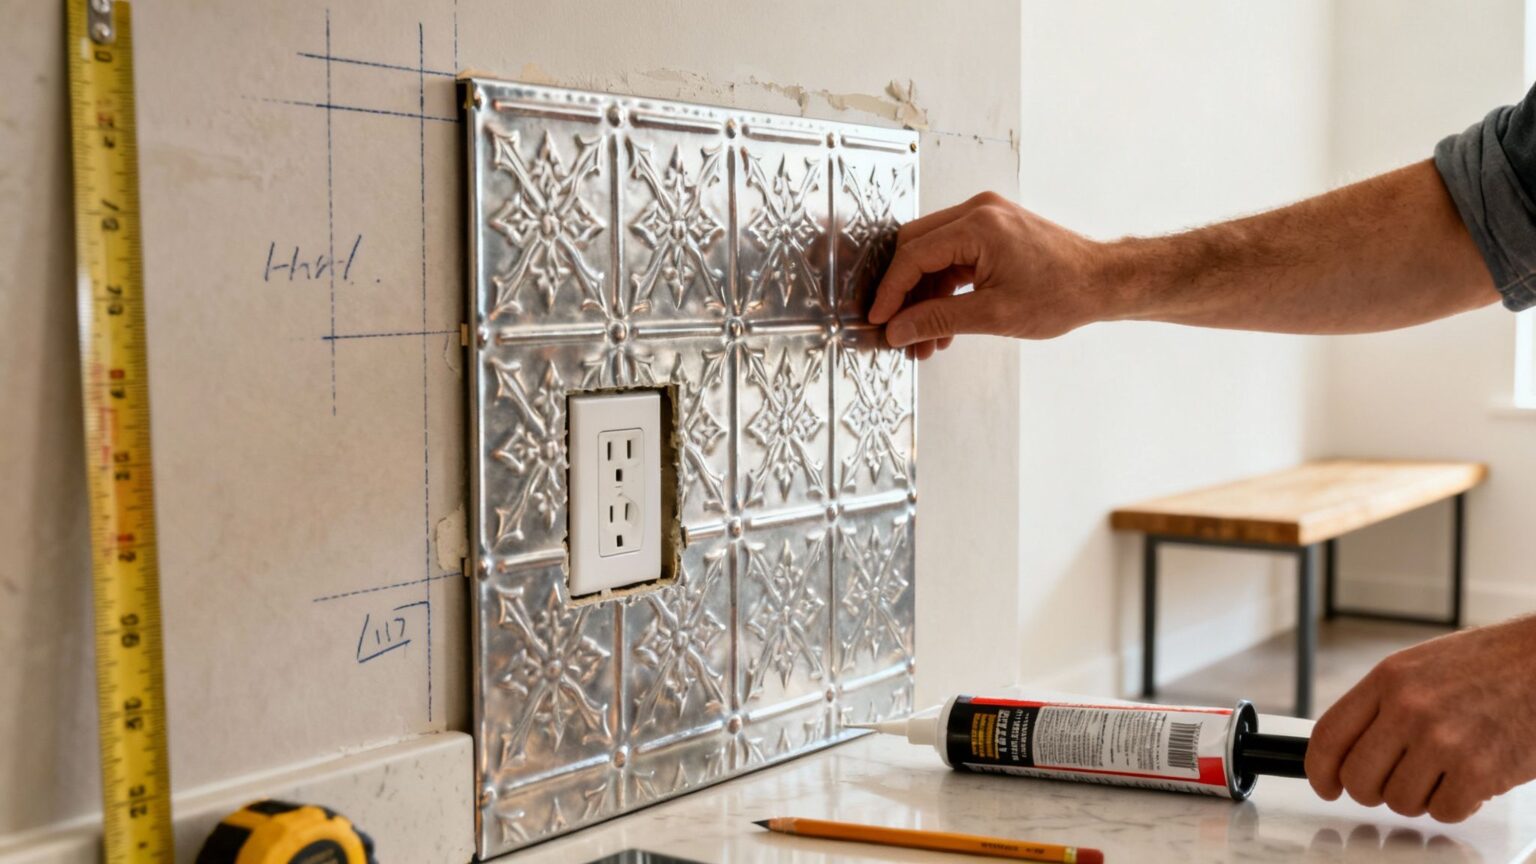
So, you've found the perfect pattern and finish for your pressed metal splashback. Fantastic! Now for the critical step: getting it from the box onto your wall.
This is where you face a classic choice, do you save on labour costs by tackling it yourself, or do you invest in a professional for a flawless, worry-free result?
Honestly, both paths are valid. The right one for you really boils down to your skills, the tools you have on hand, and how complex your kitchen layout is.
Let's break down what each option involves so you can make a call you feel good about.
The Do-It-Yourself Approach
For the hands-on homeowner with a bit of confidence, installing a pressed metal splashback is a totally achievable weekend project. The panels are lightweight and much more forgiving than tiles, no messy grout, for a start. Success, however, really hangs on careful preparation and precision.
A typical DIY install follows these key steps:
- Surface Preparation: Your wall has to be clean, dry, and perfectly flat. Any grease or bumps will stop the adhesive from getting a proper grip. This might mean a bit of sanding, filling holes, or rolling on a primer.
- Precise Measuring: This is where the old saying "measure twice, cut once" is your mantra. You need to map out the whole area, marking the exact locations for every power point, switch, and corner.
- Cutting the Panels: This is the part that can feel a bit intimidating. You'll need tools like a jigsaw with a fine-toothed blade or a good pair of tin snips to make clean cuts for outlets and get the panels to size. One wrong cut can be a costly mistake.
- Adhesive Application: A high-quality, construction-grade adhesive gets applied to the back of the panel. Getting even coverage is key to making sure the panel sits flat against the wall without any bowing.
- Positioning and Finishing: Carefully press the panel onto the wall, applying firm, even pressure. The last job is sealing the edges with silicone to create a waterproof barrier, especially around the benchtop and sink.
The biggest challenge for DIYers isn't lifting the panels, it's the absolute precision needed for the cut-outs. A professional has the experience to make these cuts look seamless, and that’s often the detail that separates a good finish from a truly great one.
When to Call in a Professional
While DIY can be incredibly rewarding, there are some pretty compelling reasons to hand the job over to an expert. A professional installer brings experience, specialised tools, and a solid understanding of building codes that can save you a whole lot of time and stress.
Hiring a pro is especially smart in a few key situations:
- Complex Layouts: If your kitchen has lots of corners, window frames, or a whole row of power points, the project's complexity shoots up dramatically.
- Gas Cooktops: Australian standards have very specific rules for installations behind gas cooktops to ensure fire safety, often requiring a fire-rated backing board. A pro will make sure your pressed metal splashback is 100% compliant.
- A Guaranteed Finish: At the end of the day, professionals are paid for perfection. They guarantee a seamless finish, perfect alignment, and clean silicone lines, all backed by a warranty on their workmanship.
Hiring an expert takes the risk of expensive errors off your plate and ensures the job is done right the first time. For bigger projects, working with experienced house renovation builders ensures your splashback is perfectly integrated with the rest of your kitchen update.
Making the Right Choice for You
Still on the fence about which way to go? This simple checklist might help clear things up. If you find yourself answering "no" to one or more of these questions, it’s a strong sign that a professional installation is the smarter investment for your project.
| Decision Factor | DIY Consideration |
|---|---|
| Skill Level | Do you have experience with precision cutting and home improvement projects? |
| Tools | Do you own or have access to a jigsaw, tin snips, and other necessary tools? |
| Complexity | Is your splashback area a simple, straight wall with minimal cut-outs? |
| Time | Do you have a full weekend you can dedicate to prep, installation, and cleanup? |
| Compliance | Are you confident you understand the fire-safety requirements for your cooktop? |
Ultimately, the choice between DIY and professional installation is about balancing your budget against your desire for a perfect, compliant, and stress-free result. Weighing these factors honestly will lead you to the best outcome for your beautiful new kitchen.
How to Budget for Your Pressed Metal Splashback
Alright, let's talk numbers. Planning a renovation is the exciting part, but having a clear financial roadmap is what keeps the project on track and stress-free.
Figuring out the cost of a pressed metal splashback isn't just about the price of the panels; you need to look at the whole picture, materials, supplies, and maybe even labour.
Budgeting for a feature like this really boils down to three main parts. If you get your head around each one, you can put together a realistic estimate and dodge any nasty surprises later on.
Breaking Down the Core Costs
When you get the final invoice, you'll see it's made up of a few key things. Each one plays a big role in the total cost, so it’s smart to think about them from the get-go.
- The Panels Themselves: This is where the price can vary the most. The cost per square metre is often tied to the pattern's complexity, more intricate, deeper designs usually cost a bit more. The material choice is a big one, too. Standard aluminium is the most budget-friendly, while premium metals like copper or zinc sit at the higher end of the price scale.
- Essential Supplies: Don't forget the supporting cast! You'll need to budget for a good quality construction adhesive to stick the panels to the wall, plus silicone sealant to waterproof all the edges. Critically, if you’re installing behind a gas cooktop, a fire-rated backing board is a mandatory addition to your shopping list.
- Labour and Installation: If you're not going down the DIY path, professional installation will be a decent chunk of your budget. Labour is usually charged by the hour or as a fixed project fee. Paying for a pro ensures you get a perfect, compliant, and warranted finish.
A key takeaway here is that the more fiddly your kitchen layout is, the higher the installation cost will be. Every single cut-out for a power point or switch adds time and precision work, and that's reflected in the final price.
Typical Price Ranges in Australia
To give you a clearer idea, here are some realistic price ranges you can expect to see. Just remember, these are estimates, and the best way forward is always to get a detailed quote for your specific space.
- Supply-Only (DIY): For just the panels, you’re looking at anywhere from $150 to $250+ per square metre. This price will shift depending on the pattern, material, and finish you land on.
- Fully Installed: If you're bringing in a professional, a fully installed pressed metal splashback typically costs between $400 and $700+ per square metre. This all-in price covers the panels, all the necessary supplies, labour, and compliance checks.
Having these figures in mind is a great starting point for any kitchen reno. To see how this piece of the puzzle fits into the bigger picture, have a look at our detailed guide on the overall kitchen renovation cost in Melbourne.
Hidden Factors That Influence Your Budget
Beyond the obvious costs, a few other things can nudge your final bill up or down. Being aware of them means you can plan more accurately and build a smart contingency fund.
- Wall Condition: If your wall is uneven, damaged, or needs a lot of prep work, this will add to the labour time and potentially the cost of materials for any repairs.
- Number of Cut-Outs: As we mentioned, every power point, light switch, or window frame that needs to be cut around adds complexity and time to the job.
- Custom Finishes: If you opt for a unique powder-coated colour or a special finish, it will naturally cost more than the standard, off-the-shelf options.
Planning for all these variables helps you approach your project with confidence, ensuring your beautiful new splashback is a smart investment that you'll love for years.
Design Ideas for Modern and Heritage Kitchens
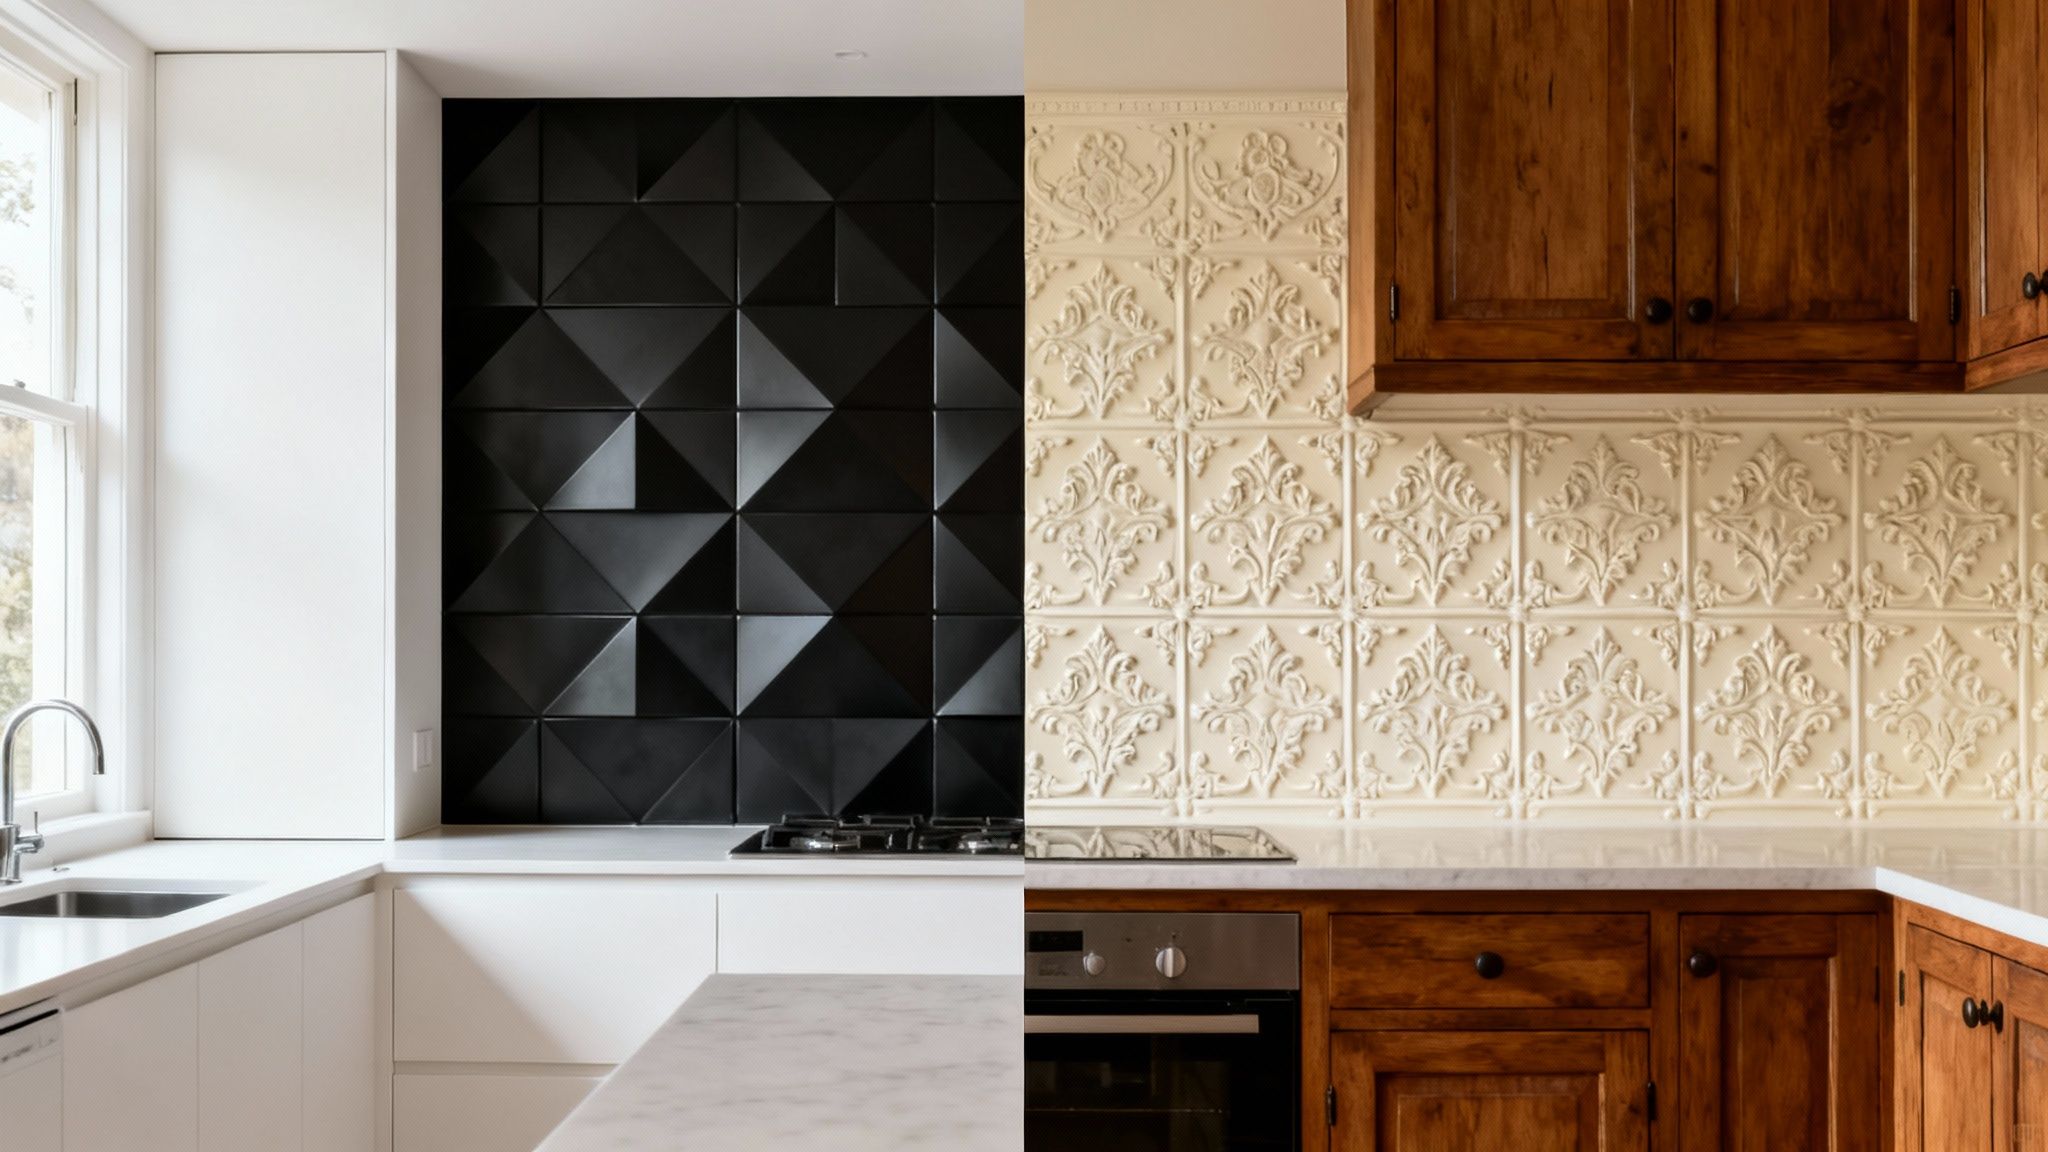
A pressed metal splashback is one of the most powerful design tools you can have in your renovation toolkit. It's so much more than just a practical surface; it’s a feature that can define the entire personality of your kitchen, acting as a bridge between pure function and genuine artistry.
Whether your home is a sleek modern build or a classic Melbourne terrace, there's a pattern and finish out there that will elevate your space. The key is to see it as the element that ties everything else together, from your cabinetry to your benchtops.
Creating a Focal Point in Modern Kitchens
In a modern kitchen, defined by its clean lines and minimalist cabinetry, a pressed metal splashback can introduce some much-needed texture and depth. It stops the space from feeling too clinical or sterile, adding a layer of visual interest without cluttering up the contemporary aesthetic.
Think of it as a piece of functional art. A bold, geometric pattern like hexagons, fish scales, or even a sharp Art Deco design can create a stunning focal point. Finished in a powder-coated matte black or a crisp white, it makes a dramatic statement that beautifully complements streamlined joinery and stone benchtops.
But it doesn't always have to be bold. For a more subtle approach, a small, repeating pattern can add a gentle texture that catches the light beautifully. This creates a sense of movement and sophistication, proving that modern design doesn't have to be plain.
Honouring Australian Heritage Homes
If you're lucky enough to own a Victorian, Federation, or Edwardian home in Melbourne, choosing the right splashback is about more than just looks, it’s about respecting the building’s history. A pressed metal splashback is a brilliant choice here because it’s historically authentic to the period.
In a heritage renovation, the goal is to enhance the home’s original character, not create a museum piece. A pressed metal splashback allows you to introduce a period-correct feature in a way that feels fresh, functional, and perfectly suited to modern living.
The trick is to select patterns that reflect the era of your home. Intricate floral designs, classic shield motifs, or ornate fleur-de-lis patterns echo the original pressed metal ceilings that were a hallmark of these incredible properties. Pairing these designs with traditional shaker-style cabinetry and heritage paint colours creates a harmonious and timeless kitchen that feels just right.
Pressed Metal Splashback Pattern and Style Pairing Guide
Matching the right pattern to your kitchen style is the secret to a cohesive design. A mismatched pattern can feel jarring and out of place, while the perfect one will make your whole kitchen sing. This quick guide will help you pair popular patterns with common kitchen aesthetics for a professional, polished result.
| Kitchen Style | Recommended Patterns | Suggested Finishes | Design Tip |
|---|---|---|---|
| Modern/Contemporary | Geometric (Hexagon, Fish Scale), Art Deco (Fans, Chevrons) | Matte Black, Crisp White, Charcoal Grey | Use the splashback to create a bold, contrasting feature wall that draws the eye. |
| Heritage (Victorian/Federation) | Ornate Florals, Shields, Clover, Acorns | Soft Whites, Creams, Heritage Colours (e.g., Dulux Federation Red) | Choose a pattern with a similar level of detail to your home's other original features, like cornices or architraves. |
| Hamptons/Coastal | Subtle Geometrics (Small Squares), Woven or Lattice Designs | Soft Blues, Light Greys, Classic White | The goal is light and airy. A soft-coloured splashback adds texture without overwhelming the relaxed feel. |
| Industrial/Loft | Raw Aluminium (Clear Coated), Simple Brick or Tile Patterns | Natural Metallic Finish, Dark Greys, Matte Black | Embrace the raw material. A sealed raw aluminium splashback adds an authentic, edgy, and industrial feel. |
| Country/Farmhouse | Simple Florals, Small Repeating Motifs (e.g., Mini Clover) | Warm Whites, Buttery Creams, Sage Green | Aim for charm and warmth. The splashback should complement natural timber benchtops and classic cabinetry. |
Think of this table as a great starting point for your design journey. At the end of the day, your pressed metal splashback is an opportunity to express your personal style while enhancing the unique character of your home. It’s often that final detail that transforms a good kitchen into a truly exceptional one.
Simple Care and Maintenance for Lasting Beauty
One of the best things about a pressed metal splashback is how it manages to look so intricate yet be incredibly easy to live with. You get all that visual punch without the high-maintenance cleaning routine, which is exactly what you want in a busy kitchen. A lot of people see the detailed, embossed patterns and assume they'd be a nightmare to clean, but the reality is refreshingly simple.
Unlike tiled splashbacks, you don't have to worry about porous grout lines that love to soak up grease and get discoloured over time. A pressed metal panel is just one seamless surface. This makes the day-to-day wipe-downs quick and easy, keeping your splashback hygienic and looking fantastic for years to come.
Your Go-To Cleaning Routine
For daily food splatters and water spots, there's no need for harsh chemicals or fancy products. Keeping your splashback looking pristine is incredibly straightforward.
- The Right Tools: A soft microfibre cloth or a non-abrasive sponge is all you need.
- The Gentle Solution: Your best bet is a simple mix of warm water with a few drops of mild dish soap.
- The Method: Just wipe the surface down with the soapy water, then give it a rinse with a clean, damp cloth to get rid of any soap residue. To finish, dry it thoroughly with another soft cloth to prevent water marks and bring back that beautiful sheen.
The golden rule is to avoid abrasive materials at all costs. Things like scouring pads, steel wool, or harsh chemical cleaners (think bleach) can easily scratch and permanently damage the powder-coated or sealed finish.
Long-Term Care and Protection
Beyond the daily wipe-down, a few simple habits will protect your investment for the long haul. Looking after your pressed metal splashback properly isn't just about keeping it looking good; it's about maintaining its structural integrity, too.
A key thing to watch is the waterproof seal along the edges, especially where the panel meets the benchtop. Once a year, it’s a good idea to check the silicone sealant to make sure there are no gaps or signs of wear. This quick check stops moisture from creeping in behind the panel, which is vital for protecting your wall.
If you do happen to notice a small scuff on a powder-coated surface, it's best to sort it out quickly. Your installer or the panel supplier can usually give you some advice or a touch-up kit that's a perfect match for your finish.
Frequently Asked Questions
Even after covering all the details, you might still have a few questions rolling around in your head about bringing a pressed metal splashback into your kitchen. Let’s tackle some of the most common queries we hear from Melbourne homeowners, giving you clear, practical answers so you can feel completely confident in your choice.
Are Pressed Metal Splashbacks Safe Behind a Gas Cooktop?
Yes, absolutely – as long as they’re installed correctly. Australian regulations are incredibly strict on this, and for good reason. To be compliant, a fire-rated backing board, like cement sheeting, must be fitted between the wall and the metal panel itself.
Aluminium, which is the go-to material for a pressed metal splashback, is fantastic with heat. When you pair it with that mandatory fire-rated backing, you get a surface that is perfectly safe and compliant behind any residential gas cooktop.
How Does Pressed Metal Compare to Glass or Tiles?
Each material brings a completely different feel to a kitchen, so the "best" choice really comes down to what you value most.
Here’s a quick rundown:
- Aesthetics: Pressed metal offers a unique texture, depth, and heritage character that you simply can't get from flat glass or individual tiles. It’s a statement piece.
- Durability: It’s tough stuff. It won't crack or chip the way tiles can, and unlike glass, there’s zero risk of it shattering from an accidental knock.
- Maintenance: This is a big one. With no grout lines to scrub, keeping pressed metal clean and hygienic is often far easier than dealing with traditional tiles.
- Cost: While the initial outlay can be similar to mid-range tiles or glass, the simpler installation and incredible longevity often mean it delivers fantastic value in the long run.
Can I Install a Pressed Metal Splashback Over Existing Tiles?
In many situations, you sure can. This approach can save a huge amount of time, money, and mess by skipping the demolition phase. But, and this is a big but, its success hinges entirely on proper prep work.
The key is making sure the tiled surface is spotlessly clean and perfectly level. Any lingering grease will stop the adhesive from getting a good grip, and uneven tiles will cause the new panel to sit poorly on the wall.
You’ll need to give the old tiles a thorough degreasing and fill in any low spots or wide grout lines to create a smooth, flat foundation for the new panel to stick to.
Is It Difficult to Clean the Embossed Patterns?
Not at all. This is a common worry we hear, but cleaning the patterns is surprisingly straightforward. Because the panel is one single, non-porous sheet, grease and food splashes just sit on the surface; they can't soak in.
A quick wipe-down with a soft cloth and some mild, soapy water is all it takes to handle daily grime. The beautiful designs don't trap dirt the way porous, gritty tile grout does.
Ready to see how a stunning pressed metal splashback could completely change the feel of your Melbourne kitchen?
The team at Smarter Home Renovations brings over 20 years of hands-on expertise to every project, ensuring a flawless finish that perfectly matches your home’s character.