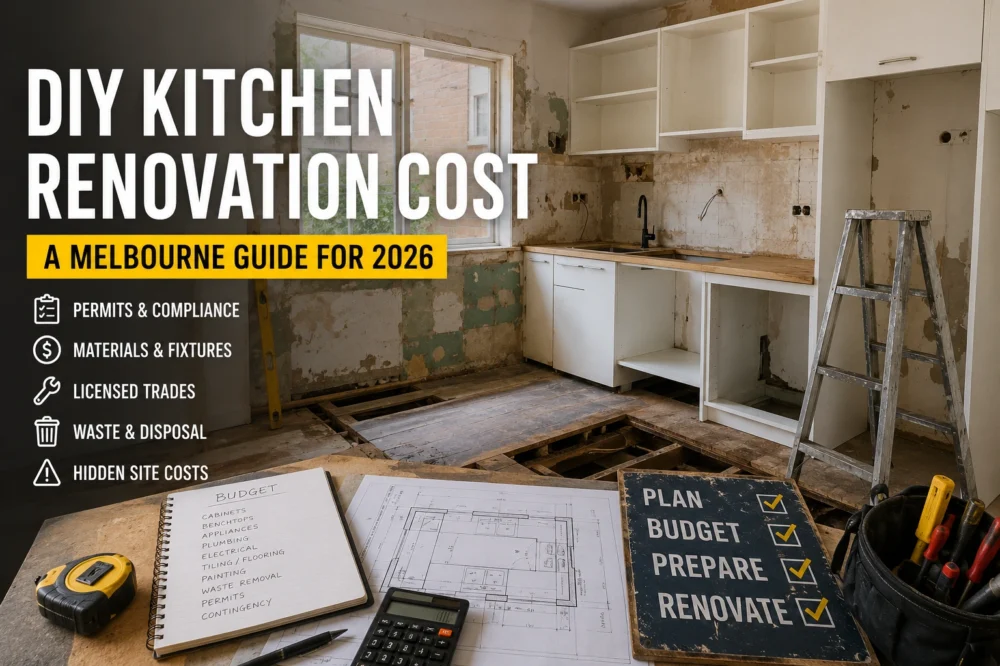
Get a realistic DIY kitchen renovation cost for Melbourne. Our 2026 guide covers materials, permits and hidden costs to budget smarter.
You've measured the room, priced a flat-pack kitchen, and started adding up the savings if you handle the demo, painting, and cabinet assembly yourself. On a Melbourne job, that first budget often looks reasonable. Then actual site conditions show up.

Older plaster is out of square. Floor levels are off. The switchboard is outdated. A simple cabinet swap turns into plumbing changes, electrical work, patching, disposal, and time off work to coordinate trades.
That's the gap many DIY budgets miss.
Much of the online advice about DIY kitchen renovation costs is based on overseas pricing and building rules that don’t apply in Victoria. In Melbourne, any work involving electrical, gas, plumbing, waterproofing or structural changes must meet local regulations and often requires licensed trades, so it’s important to budget with compliance costs in mind from the beginning.
Council controls can also affect the job before a cabinet arrives. Period homes in inner and middle-ring suburbs may sit in a heritage overlay. Older houses regularly hide asbestos, damaged subfloors, brick chimneys, or services that were installed decades ago and never mapped properly. Those are the costs that turn a cheap plan into an expensive correction.
The practical question is not whether DIY can save money. It can. The question is where DIY saves safely, where licensed trades are required, and what a realistic Melbourne budget looks like once permits, materials, waste, and site surprises are included.
Your Guide to DIY Kitchen Renovation Costs in Melbourne
You price a flat-pack kitchen on Saturday, allow a few grand for appliances, and figure you will save the labour by doing the strip-out, painting, and install yourself. By Monday, the numbers have already shifted. The old floor is out of level, the wall behind the cabinets is not straight, and the power points are in the wrong spots for the new layout.
That is a normal Melbourne renovation.
The first mistake I see is homeowners using overseas budgets as if they apply here. They do not. Victoria has different labour rates, different compliance rules, and a lot more older housing stock with hidden defects. A DIY kitchen renovation in Brunswick, Coburg or Camberwell can vary greatly depending on the age of the home, existing layout, access, and local compliance requirements. Many Melbourne properties also uncover hidden issues during demolition, which can quickly affect the overall renovation budget.
Why Melbourne numbers matter
Local pricing changes the whole feasibility of the job.
Cabinetry, benchtops, appliances, skip bins, plaster repairs, and trade callouts all land differently in Melbourne than they do in generic online guides. The legal side matters too. If the renovation touches electrical, gas, plumbing, waterproofing, or structural work, you cannot budget as though it is all owner-installed. Some work must be done by licensed trades, and if structural changes are involved, VBA and permit costs can become part of the job.
That is where DIY budgets usually come unstuck. The joinery price might look manageable, but the support work around it often decides whether the project stays affordable.
Practical rule: Build your budget around Melbourne prices, Victorian regulations, and the age of your house. Do not start with imported figures and hope they translate.
The house itself often decides the cost
A 1990s project home and a 1920s weatherboard can both need a new kitchen, but they do not carry the same risk.
In older Melbourne homes, I expect surprises. Lathe-and-plaster walls can crumble during demolition. Timber floors often need packing or levelling before cabinets go in properly. Old plumbing may not suit modern appliance locations. Some homes have asbestos in sheet linings, splashback substrates, eaves nearby, or old vinyl backing. If the property sits in a heritage overlay, even minor external changes tied to vents, windows, or structural alterations can trigger extra checks.
Newer homes are usually simpler, but not always cheap. A layout change still means moving services, patching finishes, and coordinating licensed trades. Add an island, wall oven, induction cooktop, or new lighting plan, and the budget lifts quickly.
DIY can save real money in Melbourne. The savings usually come from demolition, painting, simple assembly, and project coordination. The expensive mistakes come from underpricing compliance, disposal, rectification, and the hidden condition of the house.
Deconstructing the Average DIY Kitchen Cost

A Melbourne homeowner prices flat-pack cabinets, a laminate top, and a new oven, then assumes the kitchen can be done for the sticker price plus a few weekends. In practice, the job cost is made up of layers. Materials are only one part. Trade callouts, disposal, service changes, and whatever turns up after demolition usually decide where the final number lands.
For Melbourne metro suburbs, a useful benchmark comes from the HIA 2025 Kitchen Renovation Report for Victoria, which places a full DIY kitchen remodel at AUD 15,000 to 35,000 for a standard project, excluding your own labour. The report also notes that 42% of DIY projects exceed budget by 25 to 50%, often due to conditions discovered once work starts.
The baseline spend
Treat AUD 15,000 to 35,000 as a working range, not a promise.
At the lower end, that usually means keeping the layout, choosing straightforward finishes, and doing the simple tasks yourself. At the upper end, the same kitchen starts to absorb better appliances, upgraded surfaces, extra prep work, and more licensed trade involvement. In Melbourne, that climb happens fast once you touch plumbing, wiring, or gas.
What usually sits inside that range
The HIA-referenced figures for Melbourne point to a standard DIY spend that often includes:
- Materials overall: AUD 5,000 to 10,000 for the main supply items.
- Laminate countertops: AUD 200 to 400 per sqm.
- Flat-pack cabinets: AUD 3,000 to 7,000.
- Basic appliances: AUD 4,000 to 8,000.
Those numbers are useful as a filter. If the allowance assumes stone benchtops, premium integrated appliances, custom joinery, and feature lighting, the budget has already drifted away from a typical DIY job.
What the headline figure leaves out
Your own time is the first omission. A kitchen renovation ties up nights, weekends, site clean-up, delivery coordination, and problem-solving. If one cabinet run is out by 10mm, the rest of the install can slow to a crawl.
The second omission is corrective work. The same HIA report notes average overruns of AUD 6,500, with common causes including plumbing mistakes in 18% of cases, costing AUD 2,000 to 5,000 in fixes, and electrical non-compliance requiring licensed rewiring at AUD 1,500 to 3,000.
A DIY kitchen can look affordable on day one and expensive the moment licensed rectification is needed.
Labour savings are real, but they are not automatic
Owners take on DIY to cut labour costs, and that can be a fair reason to do it. The same source notes that DIY can save AUD 10,000 to 20,000 in labour, roughly 30 to 40% of professional costs.
The difference is significant because those savings only hold if the work is legal, accurate, and finished without rework. In Victoria, some jobs are not owner-performer work at all. Electrical must be done by a licensed electrician. Most plumbing and all gasfitting must be carried out by licensed practitioners. If you are unsure where the line sits, this guide on what Melbourne homeowners can and can't do in a DIY renovation is worth reading before you cost the project.
A good budget should therefore separate three buckets from the start:
- Core materials: Cabinets, benchtops, splashback, flooring, fixtures, appliances.
- Licensed and regulated work: Plumbing, electrical, gas, appliance connection, and any approvals.
- Contingency: Money held back for demolition surprises, patching, disposal, and fixes.
A realistic way to read the range
A cosmetic update in a newer home can stay near the lower end if the layout remains unchanged and the finishes are sensible. A kitchen in a period home, or any job that moves services, can push well past the midpoint before the room even starts to look finished.
That is the part many generic overseas guides miss. In Melbourne, the cost of a DIY kitchen is tied to local trade rates, Victorian compliance rules, and the condition of the house you are opening up.
DIY Savings vs Professional Value A Realistic Comparison

The usual comparison is too simple. DIY looks cheaper. Professional looks dearer. End of story.
That's not how it plays out once resale, compliance, and insurance enter the picture.
For Melbourne homeowners, property and insurance experts consistently warn that unapproved DIY work can affect both resale value and insurance claims. Unpermitted renovations may raise concerns during property inspections, valuations and buyer due diligence, while insurers can reject claims linked to unlicensed or non-compliant electrical and plumbing work.
Upfront cost
DIY option: The appeal is obvious. You avoid much of the labour charge and control your purchasing decisions directly.
Professional option: The initial quote is higher, but it usually reflects proper sequencing, licensed trades, project management, and accountability if something goes wrong.
That difference matters because kitchen work isn't just cabinet assembly. Once wiring, plumbing, appliance fitting, and finish quality come into play, “cheap upfront” can become expensive after handover.
Risk and compliance
DIY option: You carry more of the risk yourself. If work falls outside what an owner can legally do, the savings can disappear in rectification, permit trouble, or insurer disputes.
Professional option: Licensed trades document the work, complete the regulated parts properly, and reduce the chance that you're left proving compliance later.
For a useful breakdown of what Melbourne owners can and can't legally tackle, this guide on DIY vs professional renovations for Melbourne homeowners is worth reading before you finalise your scope.
Timeline and disruption
DIY option: Owners often underestimate how long the room stays out of action. Deliveries arrive late, assembly takes longer than expected, and one wrong measurement can stall the job while parts are reordered.
Professional option: A builder or renovation team usually runs a tighter sequence. Trades are booked in order, defects are picked up earlier, and delays are easier to manage because one person is coordinating the job.
A kitchen renovation goes off the rails when no one is in charge of the whole sequence.
Finish quality
DIY option: Some owners do excellent cosmetic work. Painting, handles, flat-pack assembly, shelving, and demolition are all manageable in the right hands.
But kitchens are unforgiving. Crooked cabinet runs, poor filler panels, rough silicone, chipped laminate edges, and uneven appliance spacing are easy to spot every day after the project ends.
Professional option: You're paying for fit-out quality as much as labour. Straight lines, tight gaps, clean services, and proper integration between trades make the kitchen feel expensive even when the materials are fairly modest.
Resale impact
DIY option: A buyer may like the style, but sale campaigns get harder if the workmanship looks improvised or documentation is incomplete. The resale penalty from code issues is the serious part, not just aesthetics.
Professional option: Buyers and valuers generally respond better to kitchens that look coherent, compliant, and durable. A properly finished kitchen also gives agents fewer objections to explain.
Insurance position
DIY option: Many owners get caught at this stage. If an electrical or plumbing problem later causes damage, the question won't be whether you meant well. It will be whether the work was permitted and completed legally.
Professional option: That paper trail matters. In practical terms, proper invoices, certificates, and licensed trade records can save far more stress than they cost.
If you're only comparing invoice totals, DIY usually wins. If you compare total value, legal exposure, finish quality, and what happens when something fails, the gap gets much smaller.
How to Create Your Itemised DIY Kitchen Budget

You strip out the old cabinets on a Saturday, price the flat-packs on Sunday, and by Monday the budget is already wrong. That is the standard pattern. The missing costs are rarely the cabinets themselves. They are the bits around the edges. Delivery, disposal, extra power points, patching walls, filler panels, blades, sealants, and the small trade jobs that stop a DIY kitchen from becoming a defect list.
The fix is simple. Price the job in a spreadsheet, line by line, before you order anything.
Start with scope, not products
Write down exactly what is changing in the room. Keep it blunt.
Are you keeping the same layout, or moving the sink and appliances? Will the existing flooring be reused, or will repairs and finishing be required beneath the old cabinetry? Are the walls in sound condition, or will they need plaster repairs once the splashback comes off? In many Melbourne period homes, the answer changes after demolition. Lathe and plaster, uneven floors, and old service runs can turn a cheap cosmetic update into a more expensive rework.
A budget built on scope holds up better than a budget built on wishful pricing.
Split every item into needs and upgrades
Do this before you compare brands.
Needs are the items required to make the kitchen functional, compliant, and durable. Cabinets, benchtop, sink, tap, appliances, lighting, licensed electrical work, licensed plumbing, waste removal, and basic wall repairs sit in this group.
Upgrades are the items that improve the finish but can be trimmed without breaking the project. Stone instead of laminate. Full-height splashback. Soft-close hardware on every drawer. Feature pendants over the island. Premium handles and tapware.
That separation stops the usual problem. Owners start with a photo they like, then try to reverse-engineer a budget around it.
Build your spreadsheet by trade and by product
Use narrow categories. Broad allowances hide overruns.
A practical DIY kitchen budget usually needs lines for:
- Demolition and disposal: skip hire, tip fees, protective floor covering, dust control
- Cabinetry: carcasses, doors, panels, fillers, hinges, handles, kickboards, delivery
- Benchtops: material, cut-outs, joins, installation, templating if required
- Appliances: oven, cooktop, rangehood, dishwasher, fridge clearance allowance
- Plumbing items: sink, tapware, wastes, shut-off valves, flexi hoses
- Electrical items: fittings, switches, GPOs, appliance circuits, under-cabinet lighting
- Wall and floor finishes: plaster patching, paint, tiles, grout, trim, flooring repairs
- Tools and consumables: blades, drill bits, fixings, packers, adhesives, silicone, caulk, drop sheets
- Admin and compliance: drawings if needed, permit-related costs, inspections, certificates where applicable
- Contingency: a separate line, not a note in your head
If you are changing the sink position or adding a dishwasher, allow for the rough-in work early. Homeowners often miss the cost of new waste and water point locations until cabinets are already on site. A basic understanding of plumbing rough-in requirements for kitchen renovations helps you budget the hidden work before it becomes a variation.
Use real supplier pricing
Do not rely on memory or round numbers from a weekend showroom visit.
Pull current prices from the suppliers you are likely to use in Melbourne. IKEA, Bunnings, Beaumont, appliance retailers, local stone shops, and cabinet hardware suppliers all price differently, and stock changes fast. Save screenshots, note delivery charges, and write the date beside each item. If the project slips by a month, you can update the right lines instead of rebuilding the whole budget.
Trades should be priced the same way. Get actual quotes for regulated work, including any call-out, fit-off, and certificate costs. If you need licensed sparkies for new circuits, appliance connections, or switchboard-related work, price that against a proper scope rather than a guess from a mate. Comparing quotes for professional home electrical repairs can help you set a more realistic allowance for the electrical side of the kitchen.
Track tools separately from materials
Many DIY budgets drift at this stage.
Tools should sit in their own column with three labels. Own, hire, or buy. That keeps one-off purchases visible. Tile cutter hire, clamps, laser level, oscillating blades, hole saws, and edge-trimming gear add up quickly, especially if you discover halfway through that the first cheap tool cannot hold tolerance.
I generally tell owners to hire bulky, one-use gear and buy the small items they will keep reaching for. The test is straightforward. If you need it for one weekend and it will collect dust after that, hire it first.
Allow for period-home surprises
Generic renovation guides miss this part, and Melbourne houses punish that mistake.
In a 1930s or 1960s home, you can open a wall and find out-of-square studs, brittle plaster, old wiring routes, patched flooring, or a gas line sitting exactly where the new drawer bank needs to go. None of those problems are unusual. They are routine. If your kitchen is in an older brick veneer, weatherboard, or terrace, budget for make-good work from day one instead of pretending the room will come apart cleanly.
Put a hard contingency in the budget
A contingency line protects the project from the room, not from poor planning.
For a straightforward cosmetic DIY kitchen, a modest contingency may cover wall repairs, extra trims, or one small trade variation. In an older Melbourne home with service changes, the contingency often gets used. That is normal. Keep it separate so you can see whether the job is still under control, instead of drawing from the appliance allowance and calling it even.
The best DIY budgets are boring to read. They account for the dull stuff, the hidden stuff, and the work you hope you will not need. That is usually the difference between a kitchen that lands close to budget and one that stalls halfway through.
Melbourne's Hidden Costs and Mandatory Regulations

You pull out the old cabinets on a Saturday, expecting to spend the next week installing the new kitchen. By Sunday afternoon, you have exposed wiring that should not be touched, a waste pipe in the wrong spot, and a floor that drops more than you thought. That is how DIY kitchen budgets blow out in Melbourne.
The expensive problems are usually behind the finishes, and a fair bit of that work is regulated.
Licensed electrical and plumbing work
In Victoria, electrical work and most plumbing work must be done by licensed trades. That includes common kitchen jobs such as new power points, oven circuits, cooktop connections, relocating the sink, changing drainage, and any gas fitting. DIY demolition and cabinet installation are one thing. Service work is another.
If you are still scoping the job, this overview of professional home electrical repairs gives a practical sense of the kind of electrical work that belongs with a licensed contractor.
Plumbing catches people out for the same reason. A kitchen can look like a cabinet project, but the budget often shifts at the rough-in stage. If you move the sink, dishwasher, or fridge point, the work behind the wall matters more than the tapware you picked. This guide to kitchen plumbing rough-ins is a useful reference before you lock in a layout.
Permits, structural changes, and owner-builder rules
A straight cabinet swap usually does not trigger a building permit. Start removing walls, altering windows, changing structural framing, or pushing into major building work, and the permit question changes fast.
That is where Melbourne owners need to slow down and check the scope properly. The Victorian Building Authority regulates owner-builder work, and council requirements can also come into play if the property is in a heritage overlay or if external changes are involved. Period suburbs around Melbourne have plenty of homes where a kitchen sits inside a building with planning controls that generic renovation guides never mention.
Sorting this out early costs less than trying to fix it after demolition has started.
Period homes carry extra compliance and repair costs
Older Melbourne houses are rarely square, level, or straightforward.
In a Californian bungalow, Edwardian, terrace, or post-war brick veneer, it is common to find patched plaster, timber that has moved over decades, outdated switchboard capacity, old copper or galvanised pipework, and previous alterations that were done to suit an older kitchen. The room may still function, but once you install new cabinets and appliances, those defects stop being background noise and start costing money.
I see owners budget for the visible kitchen and forget the make-good work needed to get an old room ready for new joinery. That is a mistake. Cabinets need straight walls. Stone benchtops need accurate levels. Tilers need a sound substrate. None of that is guaranteed in an older house.
Flooring, asbestos, and moisture problems
Kitchen floors deserve their own allowance.
Once the old joinery comes out, you may find multiple layers of vinyl, cracked tiles, loose sheets, water damage under the sink, or subfloor dips that were hidden by the previous cabinets. If the home is older, you also need to be alert to asbestos-containing materials in old vinyl tiles, backing boards, wall linings, or eaves nearby. Suspected asbestos is not a DIY guessing game. It needs proper assessment and, where required, licensed removal.
Moisture is another budget trap. A small long-term leak can leave flooring swollen, framing damaged, or skirtings rotten. Those repairs are not optional if you want the new kitchen to last.
Waste removal and site protection
Skip bins, tip fees, dust barriers, and floor protection are easy to overlook because they do not look like kitchen items on a quote. They still cost money.
A kitchen strip-out creates bulky waste fast. Cabinets, plaster, tiles, packaging, offcuts, and old appliances pile up quickly, especially in tighter inner-suburban homes with limited access. If you do not have a disposal plan, the site becomes harder and less safe to work in, and damage to adjoining rooms becomes more likely.
Good budgeting in Melbourne means allowing for the regulated work, the permit checks, and the ugly hidden repairs. That is the part of the project that decides whether DIY saves money or turns into a stalled half-finished kitchen.
Smart Strategies to Lower Your Renovation Costs
DIY doesn't have to mean reckless. There are smart ways to reduce the diy kitchen renovation cost without creating legal or quality problems later.
The best savings usually come from keeping the scope simple, not from cutting corners on regulated work.

Keep the existing layout
If the sink, cooktop, and major appliances stay where they are, you avoid a lot of expensive service changes.
That one decision can protect your budget better than chasing a cheaper tap or shaving a little off the tile allowance. Moving less behind the walls usually means fewer surprises.
Use flat-pack where it makes sense
Flat-pack kitchens are one of the few DIY choices that often do save money if the planning is solid. The key is getting the measurements right and understanding the filler panels, end panels, service voids, and installation tolerances before you order.
If you're comparing options, this guide to the best flat-pack kitchens in Melbourne is useful for weighing value against finish and fit.
Focus on cosmetic wins
Some of the best-value kitchen upgrades are visual, not structural.
You might keep the cabinet boxes, update the doors or repaint them, replace handles, install a new splashback, and swap tired fittings. If your existing cupboards are sound, Newline Painting kitchen cupboard services show the sort of cabinet refresh that can lift the whole room without the cost and disruption of a full replacement.
Small cosmetic work can transform a kitchen. Badly planned structural changes can consume the whole budget.
Choose materials that suit the budget
A practical kitchen doesn't need the most expensive finish in every category.
Laminate benchtops, simple tile formats, and durable flooring options often deliver better value for family homes than stretching for premium materials across every surface. It's smarter to choose products that are easy to clean, easy to replace, and suited to how you use the room.
Stage the work if needed
Not every kitchen has to be demolished and rebuilt in one hit.
Some homeowners are better off splitting the job. Handle painting, hardware, shelving, and appliance upgrades first. Tackle larger joinery or service changes later when the budget allows. That phased approach reduces pressure and usually leads to better decisions.
Buy with discipline
Sales can help. So can ex-display stock and clearance lines. But random bargain hunting can backfire if products don't coordinate or lead times clash.
Buy in a sequence that supports the build. Lock the key dimensions first, then choose the pieces that depend on them. In kitchens, one wrong-size appliance can create a chain of expensive adjustments.
Planning Your Next Steps for a Successful Renovation
A realistic DIY kitchen renovation cost in Melbourne isn't just about the cabinet order and appliance spend. It's about permits, trade compliance, older-home surprises, finish quality, and how much risk you're prepared to carry yourself.
For many homeowners, the best path isn't pure DIY or full hands-off contracting. It's a hybrid approach. Do the demolition, painting, hardware, and simple assembly if you've got the skill and time. Leave electrical, plumbing, gas, waterproofing, and structural decisions to licensed professionals.
That approach usually protects the budget better than going all-in on DIY and hoping problems don't show up.
Before locking in your renovation budget, it’s worth thinking through the full scope of the project, including demolition, waste removal, storage, temporary kitchen setup, trades access and preparation work. Many Melbourne homeowners underestimate these planning costs early on, which can place pressure on the budget later in the renovation.
If you're weighing up what you can safely do yourself and what should be scoped professionally, an obligation-free conversation with a local renovation specialist can save a lot of expensive trial and error.
Frequently Asked Questions About DIY Kitchen Costs
Can I legally do my own kitchen plumbing in Victoria
No, not if it falls under regulated plumbing work.
In a Melbourne kitchen renovation, relocating a sink, altering drainage, connecting gas, or changing water supply lines usually needs a licensed plumber. Cosmetic work such as removing old cabinets or patching walls is different. Plumbing and gas work carry compliance obligations, safety risk, and insurance consequences if something fails later.
How much time should I budget for a DIY kitchen renovation
Allow longer than your first estimate.
A DIY kitchen in a lived-in home often stretches well past the planned finish date because the work has to fit around jobs, school runs, supplier delays, and the time it takes to correct mistakes. Owners also tend to underestimate the hours spent measuring, picking up materials, returning damaged items, waiting for trades, and resetting the space at the end of each day.
If this is the only kitchen in the house, budget for the inconvenience as well as the labour.
Are flat-pack kitchens a good way to save money
They can be, if the room is square and the plan is simple.
Flat-pack cabinetry usually suits newer homes and straightforward layouts where service locations stay put. In many Melbourne period homes, walls are out of plumb, floors fall away, and corners are rarely true. That means more packing, scribing, trimming, and filler panels on site. The product might be cheaper, but the install gets slower and the finish can suffer if the room is fighting you the whole way.
Do I need a permit to just replace my kitchen cabinets
Sometimes no. Sometimes yes.
A like-for-like cabinet swap is very different from work that affects walls, structure, electrical, plumbing, gas, or owner-builder obligations. If you are changing the layout, touching structural elements, or renovating as part of a larger scope, check VBA rules and council requirements before demolition starts. Sorting that out early is cheaper than stopping mid-job to fix approval issues.
What hidden cost catches DIY renovators most often
Floor preparation and waterproofing catch people out all the time.
Industry renovation cost guides across Victoria consistently show that flooring repairs, waterproofing and subfloor preparation can add significant costs to a kitchen renovation budget. In older Melbourne homes, it’s also common to uncover uneven subfloors, water damage around sinks, deteriorated vinyl underlays and missing moisture protection once the old cabinetry is removed.
For this reason, floors should be considered a foundational element, not a finishing detail. They affect cabinet levels, benchtop joins, appliance fit, and how long the kitchen lasts before problems start showing up.
If you want a clearer idea of what your kitchen can realistically cost, and which parts are safe to DIY versus better left to licensed trades, Smarter Home Renovations can help you assess the project before money starts going in the wrong places.
An early conversation can save you from budgeting off guesswork, especially if you're renovating an older Melbourne home or planning more than a cosmetic update.