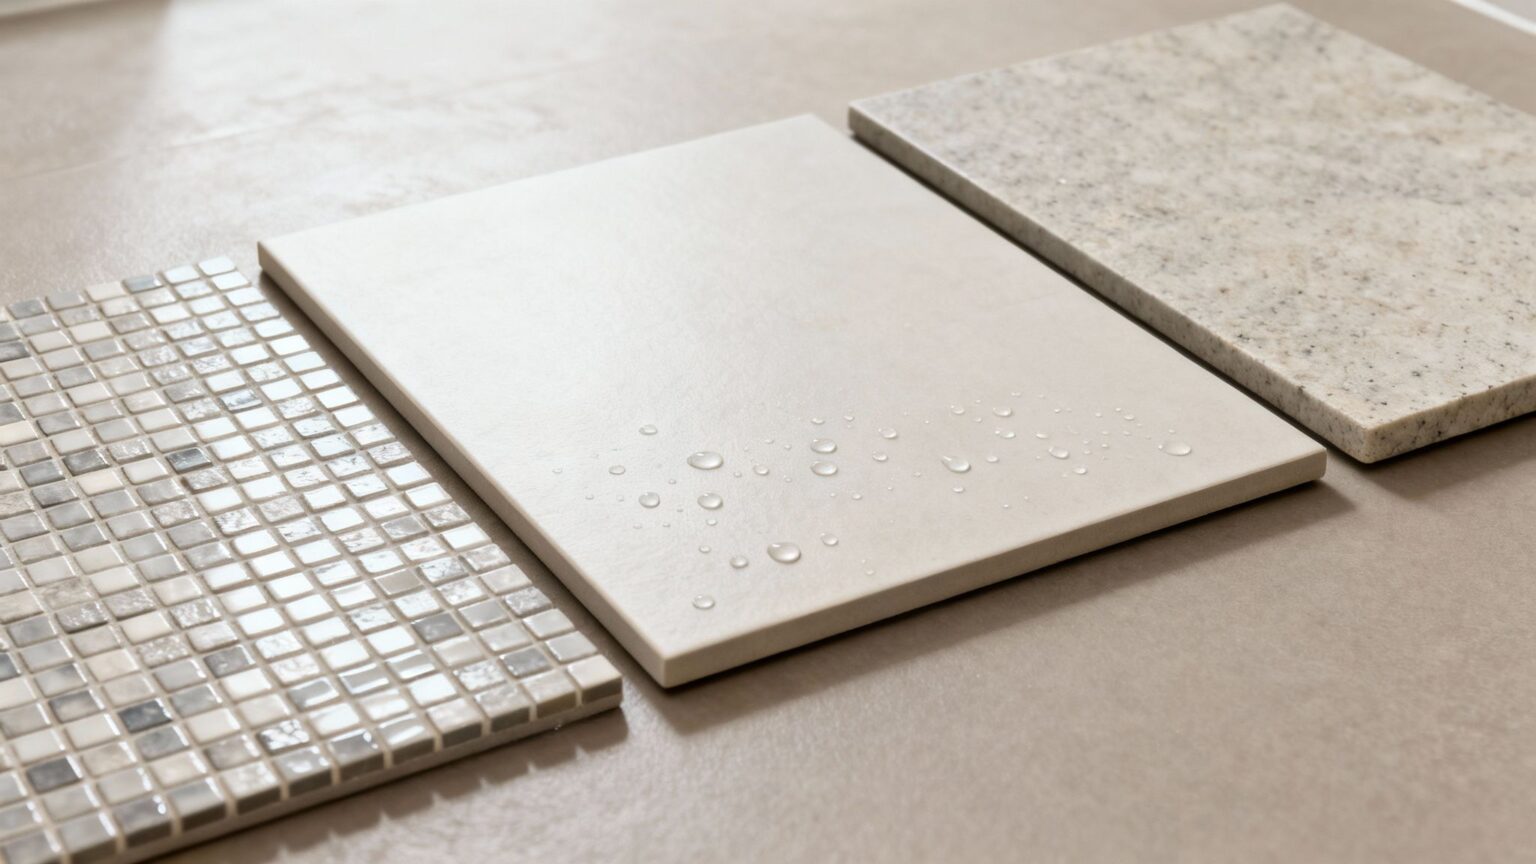
Choosing a Shower Floor Tile fro your bathroom. We have ideas, materials, waterproofing, and costs to craft a stylish, leak-free bathroom.
When it comes to choosing the best tile floor for your shower, it’s easy to get caught up in looks. But here’s a tip from the trenches: safety and water resistance have to come first. The perfect tile is a marriage of a non-slip surface and an incredibly low water absorption rate. This combo ensures your shower is not only safe to stand in but is also built to last for years. It's why porcelain, especially with its tough-as-nails nature and textured finishes, is almost always our top recommendation for this demanding, constantly wet environment.
Why Your Shower Floor Tile Choice Matters

Picking the right tile for your shower floor is so much more than a design decision. It’s a fundamental choice for safety, durability, and how much cleaning you’ll be doing down the track. Think of it like choosing tyres for your car. You wouldn’t put slick racing tyres on for a rainy Melbourne commute, would you? In the same way, the tile under your feet in the shower needs the right "tread" to prevent a nasty slip.
This isn't just any floor; it’s the foundation of your shower. It has to stand up to a daily onslaught of water, steam, and soap scum. The wrong choice can lead to a dangerously slippery surface, or worse, hidden leaks and mould growth behind the scenes. Getting a handle on the key characteristics of shower-friendly tiles will help you make a smart, lasting investment in your bathroom.
Core Concepts You Need To Know
Before we get into the nitty-gritty of different materials, there are a few non-negotiables you need to understand.
These are the core principles that separate a great shower floor from a regrettable one.
- Slip Resistance: This is, without a doubt, the most critical factor. Tiles are often given an 'R' rating (from R9 to R13), where higher numbers mean better grip. For any shower floor here in Australia, you should be looking for a rating of R10 or higher. This is the standard for ensuring safety in wet, slippery conditions.
- Water Absorption Rate: This number tells you how much moisture a tile soaks up. Materials like porcelain are champions here, with an absorption rate of less than 0.5%. This makes them virtually waterproof and the perfect candidate for a shower.
- Durability and Maintenance: Your shower floor needs to be tough enough to handle daily use and regular cleaning. Be honest with yourself about how much upkeep you’re willing to do. Some materials, like beautiful natural stone, look amazing but require routine sealing to keep them that way.
The right tile floor for your shower is a blend of science and style. It must perform flawlessly in a wet environment while also complementing your bathroom's overall design. Prioritising slip resistance and water absorption is the key to avoiding common renovation regrets.
There’s been a huge focus on safety and durability in the Australian market, which is why certain materials have become so popular. To give you an idea, ceramic tile use recently jumped to 43 million square metres. A 7.2% bounce-back as the renovation boom took hold. Much of this growth is driven by the demand for high-traction tiles perfect for wet areas like showers.
Making the right choice from the get-go means your new shower will be a place of relaxation, not a constant maintenance headache.
A Deep Dive Into Shower Tile Materials And Sizes
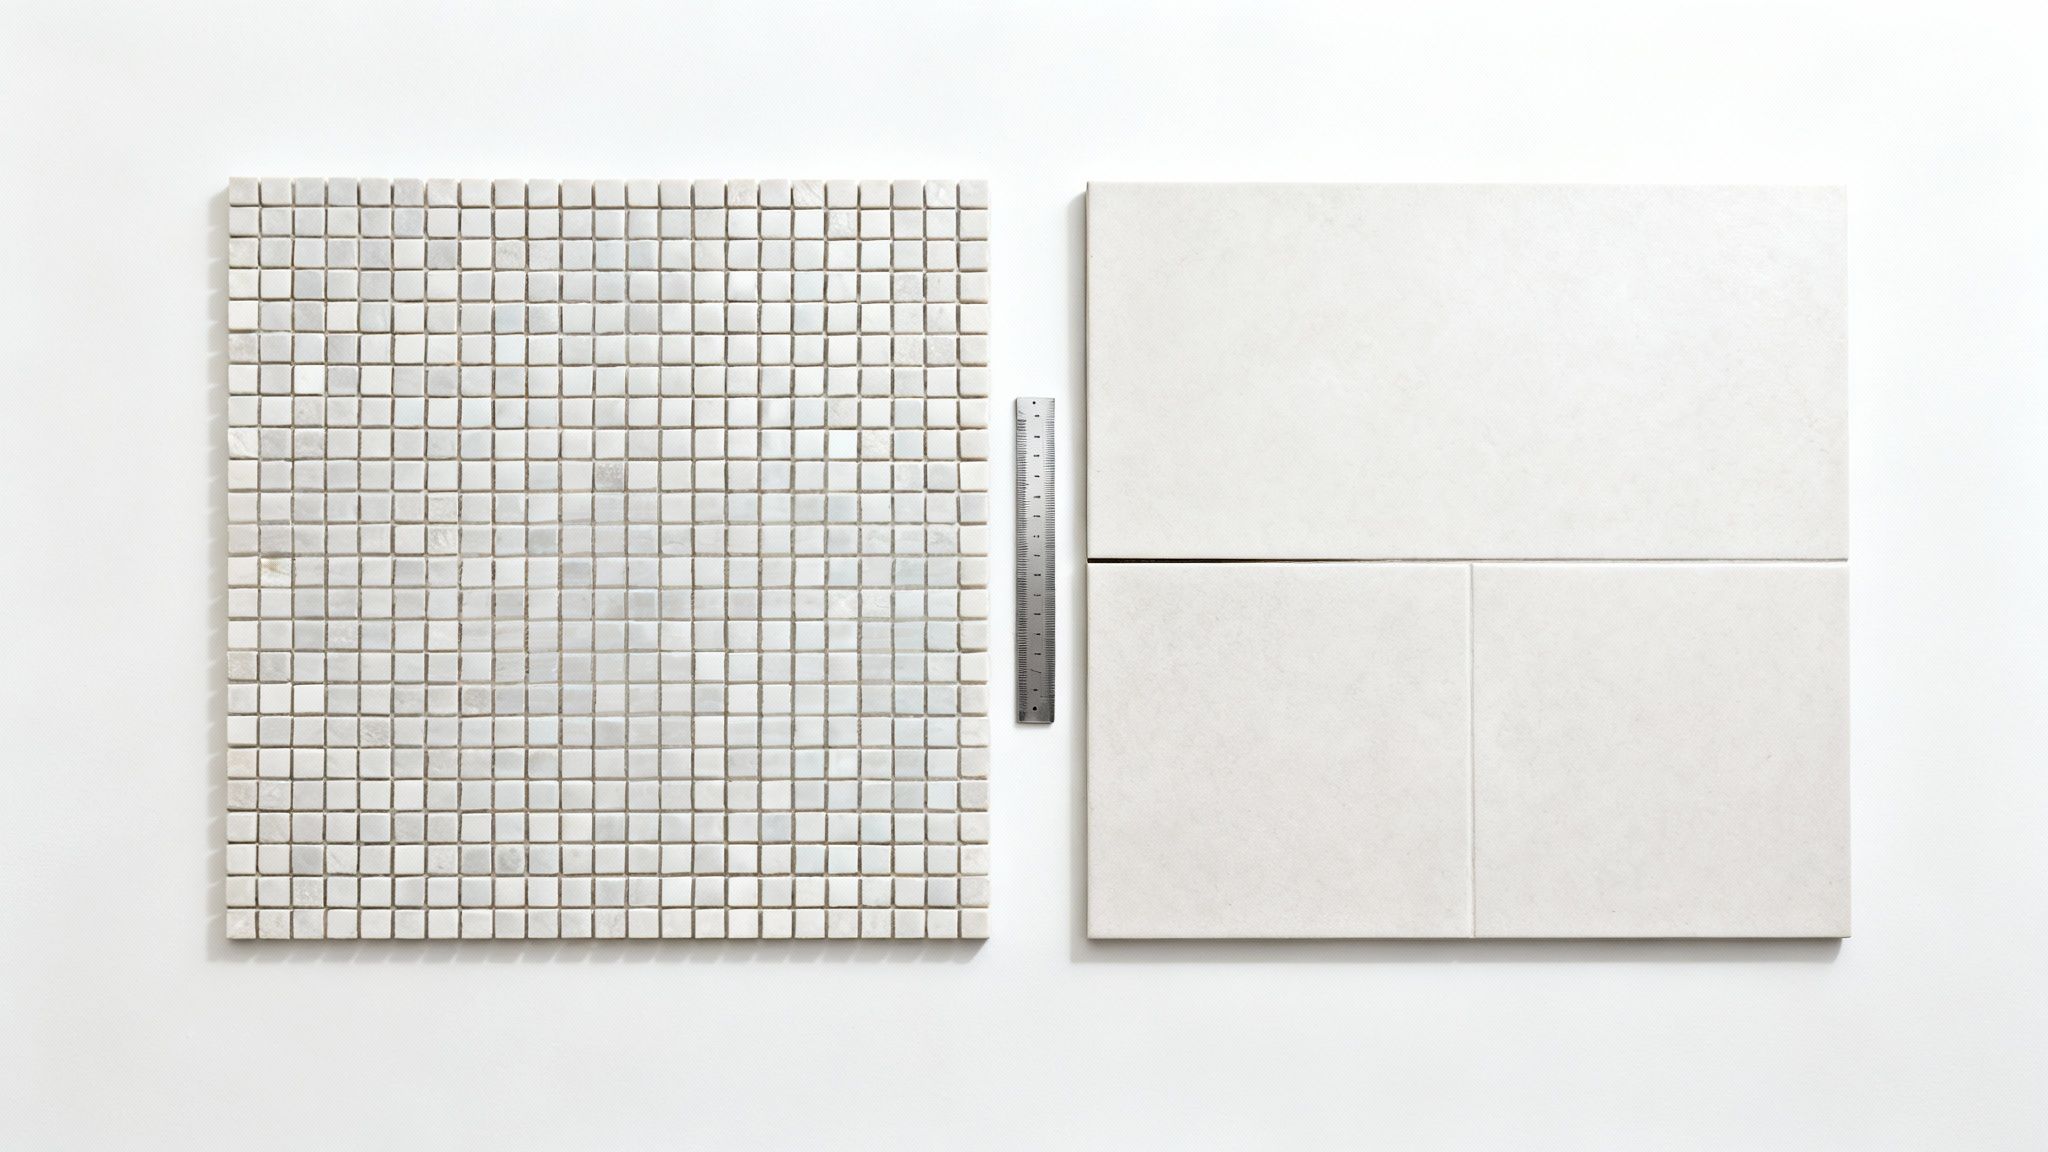
When you’re choosing a tile floor for a shower, the material you pick is a big deal. It affects everything from how safe it is day-to-day to how much cleaning you’ll be doing for years to come. Let’s be clear: not all tiles are created equal, especially when they're going to spend their lives getting soaked.
Let's break down the most popular choices so you can find the perfect match for your Melbourne bathroom.
Porcelain: The Unbeatable Champion
There’s a reason porcelain is the undisputed king of shower floors. It all comes down to one simple fact: it's incredibly dense and non-porous.
Imagine the difference between a sponge and a rock. One soaks up water, the other repels it. Porcelain is the rock in this scenario.
Its water absorption rate is less than 0.5%, which means it’s practically waterproof. This makes it ridiculously resistant to stains, mould, and the kind of cracking that moisture can cause over time. A massive plus for any shower.
The shift towards porcelain in Australia is hard to miss. In fact, it accounted for a huge 52.54% of the ceramic tiles market revenue recently, and that’s largely because its dense body is perfect for our moisture-heavy Aussie bathrooms. It's a smart, long-lasting investment.
Ceramic: A Versatile Contender
Ceramic tile is porcelain's close cousin, but it’s a little more porous. It’s a fantastic and often more budget-friendly option, but you have to be careful. It’s vital to choose a ceramic tile that’s specifically rated for floor use in wet areas.
The secret is the glaze. A quality glazed ceramic tile has a protective, waterproof layer that stops moisture from seeping into the tile itself. Stay away from unglazed ceramic, like terracotta, for shower floors, it will drink up water like there’s no tomorrow.
Natural Stone: Luxurious But Demanding
There's no denying it, natural stone is stunning. Materials like marble, slate, and travertine bring an organic, high-end feel that’s hard to beat. Each tile is completely unique, offering a look that manufactured tiles just can't replicate.
But that luxury comes with a catch: maintenance. Natural stone is porous and needs to be sealed regularly to protect it from water, stains, and soap scum. If you skip this job, you can end up with discolouration and deterioration. If you love the look but not the upkeep, you can always find a high-quality porcelain tile that beautifully mimics natural stone.
Choosing a tile material is always a balance between looks, budget, and how much maintenance you’re willing to do. While natural stone has a beauty all its own, porcelain delivers top-tier performance and peace of mind with minimal effort.
The Great Debate: Tile Size And Safety
Beyond the material, the size of your tile plays a huge role in how safe and functional your shower floor is. This is where a lot of homeowners get tripped up, choosing style over practicality.
Smaller Tiles And Mosaics
Smaller tiles, especially mosaics (usually under 5cm x 5cm), are a classic and brilliant choice for a tile floor for shower installations. The reason is simple: more tiles mean more grout lines.
Those grout lines act like a natural anti-slip grid, giving you much-needed texture and grip underfoot. This makes mosaic sheets an inherently safer pick for a wet, slippery floor. They’re also flexible enough to easily follow the subtle slope needed to guide water towards the drain.
Large Format Tiles
Large format tiles give you that sleek, modern look with fewer grout lines to scrub. They look fantastic on bathroom walls and main floors, but they create a real headache for shower bases.
Trying to create the right slope for drainage with a big, rigid tile is tough, particularly with a standard central drain. It usually means making awkward cuts and can result in "bird baths", annoying low spots where water just sits. If you're absolutely set on large tiles, your best bet is a linear drain along one edge of the shower. This allows the floor to be sloped gently in a single direction.
For a broader perspective on picking materials for your whole bathroom, have a look at our complete guide on how to choose bathroom tiles. It’s packed with useful tips that go beyond just the shower floor.
The Unseen Hero Of A Leak-Proof Shower
The beautiful tiles you choose for your shower floor are just the finishing touch. The real secret to a shower that stands the test of time, without a single leak lies completely hidden beneath the surface. Believe it or not, what’s underneath your shower floor tile is far more important than the tile itself for preventing catastrophic water damage.
Think of your shower’s waterproofing like a high-quality rain jacket. The outer fabric might look great, but it's the sealed seams and waterproof membrane inside that actually keep you dry. In a shower, this hidden system is your absolute last line of defence against moisture creeping into your home's structure.
Skipping this step properly is one of the costliest mistakes any homeowner can make. A tiny, unseen leak can lead to rotting timber frames, widespread mould, and structural repairs that easily run into the tens of thousands.
The Foundation Your Tiles Rely On
Before a drop of waterproofing is applied, you need the right base, what we call the substrate. In the old days, builders might have just used standard plasterboard, but we now know this is a recipe for disaster in a wet area, it basically turns to mush when it gets wet. T
oday, professionals insist on specialised backer boards made for the job.
- Cement Sheet: This is the reliable, go-to option here in Australia. It’s a tough, water-resistant panel that gives tilers a rock-solid, stable surface to work on. It simply won't rot, swell, or fall apart when exposed to moisture.
- Foam Backer Boards: These are a more modern, lightweight alternative that’s brilliant to work with. Made from high-density foam with a waterproof coating, they also provide great insulation and are a breeze to cut and install.
Getting the substrate right is the first critical decision in building a bulletproof shower. It’s the solid ground that the entire system is built on.
Creating The Impermeable Barrier
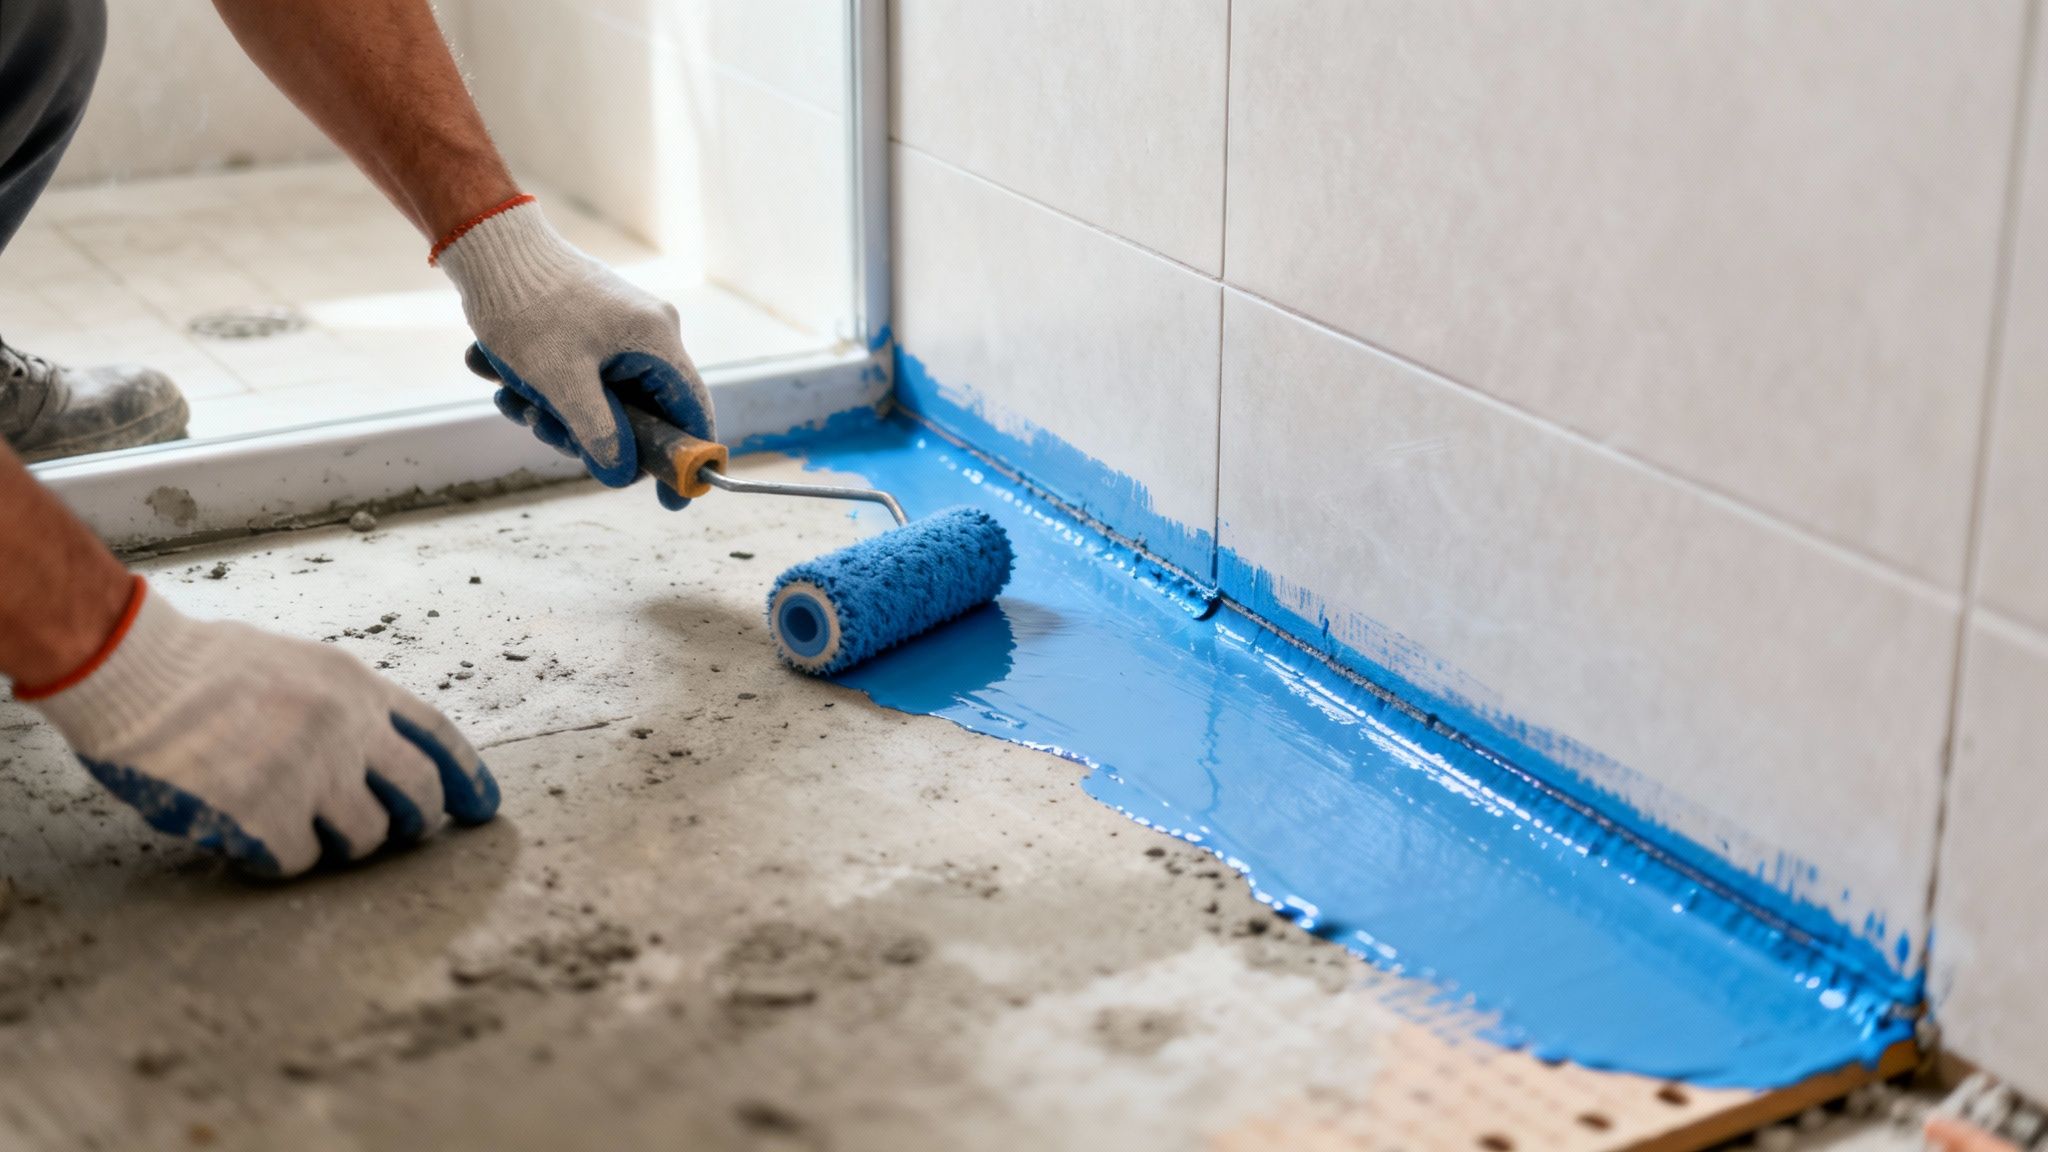
Once the backer boards are in, the next stage is applying the waterproof membrane. This is where the magic really happens. This liquid-applied or sheet membrane creates a seamless, flexible, and completely impermeable barrier that stops any water from getting through.
This process isn't just a casual slap-it-on job; it's governed by strict regulations. The Australian Standard AS 3740, Waterproofing of domestic wet areas dictates exactly how this must be done to be compliant. It spells out which areas need waterproofing, how far up the walls the membrane has to go, and how all the corners and joints have to be detailed.
A properly installed waterproofing system isn't just a good idea; it's a non-negotiable requirement. It’s the difference between a shower that lasts for decades and one that fails in a few years, causing expensive structural damage to your home.
This membrane is meticulously painted over the entire shower floor, up the walls, and especially over the "bond breaker" tape that seals the vulnerable corners and joints where walls and floors meet. For a deeper dive into the specific products we use, our guide on the best waterproofing for bathrooms explains modern systems in more detail.
Finally, while the membrane does the heavy lifting, your grout has a role to play, too. Properly sealing grout in shower is a critical final step to protect against mould and water getting in. Following these standards isn’t about ticking a box; it’s about protecting your biggest investment, your home.
Getting The Slope Right For Perfect Drainage
There’s nothing quite like a freshly tiled shower floor. But if water starts pooling in the corners instead of vanishing down the drain, that beautiful new surface becomes a major headache. Proper drainage isn't just a minor detail; it’s the hidden science that makes your shower actually work. The secret is creating a subtle, consistent slope, what we call the 'fall' in the trade, that expertly guides every drop of water towards the drain.
This isn’t something left to guesswork or a keen eye. The Building Code of Australia and Australian Standard AS 3740 lay down firm rules to prevent these exact problems. For a standard shower, the required fall needs to be between 1:60 and 1:80.
So, what does that actually mean on the job site? A 1:80 fall means for every 80 centimetres you move away from the drain, the floor needs to drop by one centimetre. It’s a gradient so slight you’d barely notice it standing on it, but it’s more than enough for gravity to do its thing, ensuring your shower floor dries out and stops stagnant water from becoming a breeding ground for mould and grime.
The Critical Role Of The Pre-Slope
Here’s a crucial step that, believe it or not, even some builders get wrong: the real drainage work begins before the waterproofing membrane ever goes down. Any professionally built shower worth its salt has two slopes. The first is the pre-slope, which is a bed of mortar screed shaped to fall towards the drain underneath the waterproof layer.
Think of it like a secret safety net. Your tiles and grout are the first line of defence against water, but over years of use, tiny amounts of moisture will inevitably find a way through. Without a pre-slope, that water would just sit on the flat waterproofing membrane, trapped and stagnant beneath your tiles. This creates a permanently damp, smelly environment that’s perfect for mould and eventually causes everything to break down.
The pre-slope makes sure that any water getting past the tiles is still guided towards the drain’s weepholes, tiny outlets built into the drain base designed specifically to let this subsurface moisture escape. It's a part of the job you'll never see, but it's absolutely vital for a long-lasting, leak-proof shower.
A shower floor without a pre-slope is a hidden failure waiting to happen. It traps moisture beneath the tiles, leading to persistent dampness, foul odours, and the eventual breakdown of the entire system.
Choosing Your Drain: A Centrepiece Or A Sleek Line
The type of drain you go for has a massive impact on both the final look of your shower and how complex the tiling job becomes.
Traditional Centre Drains: This is the classic square or round drain you’ll find in the middle of most older showers. To make this work, the tiler has to slope the floor down towards it from all four sides, creating a shape like a very shallow, inverted pyramid. This method is perfectly fine for small tiles or mosaics, as they can easily follow the contours of the multi-directional slope without awkward cuts.
Linear Drains: Also known as channel drains, these are long, sleek grates usually set against one wall. Their biggest advantage is allowing the entire shower floor to slope gently in a single direction, just like a ramp. This makes the tiler's job much, much easier, especially if you’re dreaming of using those huge, large-format tiles for a seamless, modern look. A linear drain gets rid of the need for lots of fiddly cuts and is key to achieving that clean, minimalist aesthetic.
Understanding The Tile Installation Process
While we always recommend getting a professional tiler for your shower floor, knowing how the job is done is incredibly empowering. It helps you understand what you're looking at, ask the right questions, and spot the difference between quality work and a shortcut that could cost you dearly later on. This isn't about turning you into a DIY expert overnight; it's about making you a smart, confident homeowner.
Think of it as a sequence of critical steps, where each one builds on the last. If any single stage is rushed or done poorly, the whole system can be compromised, leading to annoying loose tiles or, worse, a serious leak.
Laying The Foundation: Mortar and Adhesive
Once the waterproofing membrane has had plenty of time to cure, the first real tiling step is laying the mortar bed. This isn't just a simple flat layer of cement. It's carefully shaped and screeded by hand to create that final, critical slope towards the drain we talked about earlier. This is the solid base your tiles will actually sit on.
Next, the tiler will comb out a layer of thin-set mortar (tile adhesive) using a notched trowel. The size of those notches is crucial; it’s specifically chosen to match the tile size and ensure the perfect amount of adhesive is used.
A key sign of a top-notch tiler is a technique called "back buttering." They'll apply a thin, smooth layer of adhesive to the back of each tile before pressing it into the mortar bed. This simple step guarantees 100% adhesive coverage, getting rid of any hollow spots under the tile that can lead to cracks or water getting where it shouldn't.
The diagram below really helps to visualise how all these layers work together.
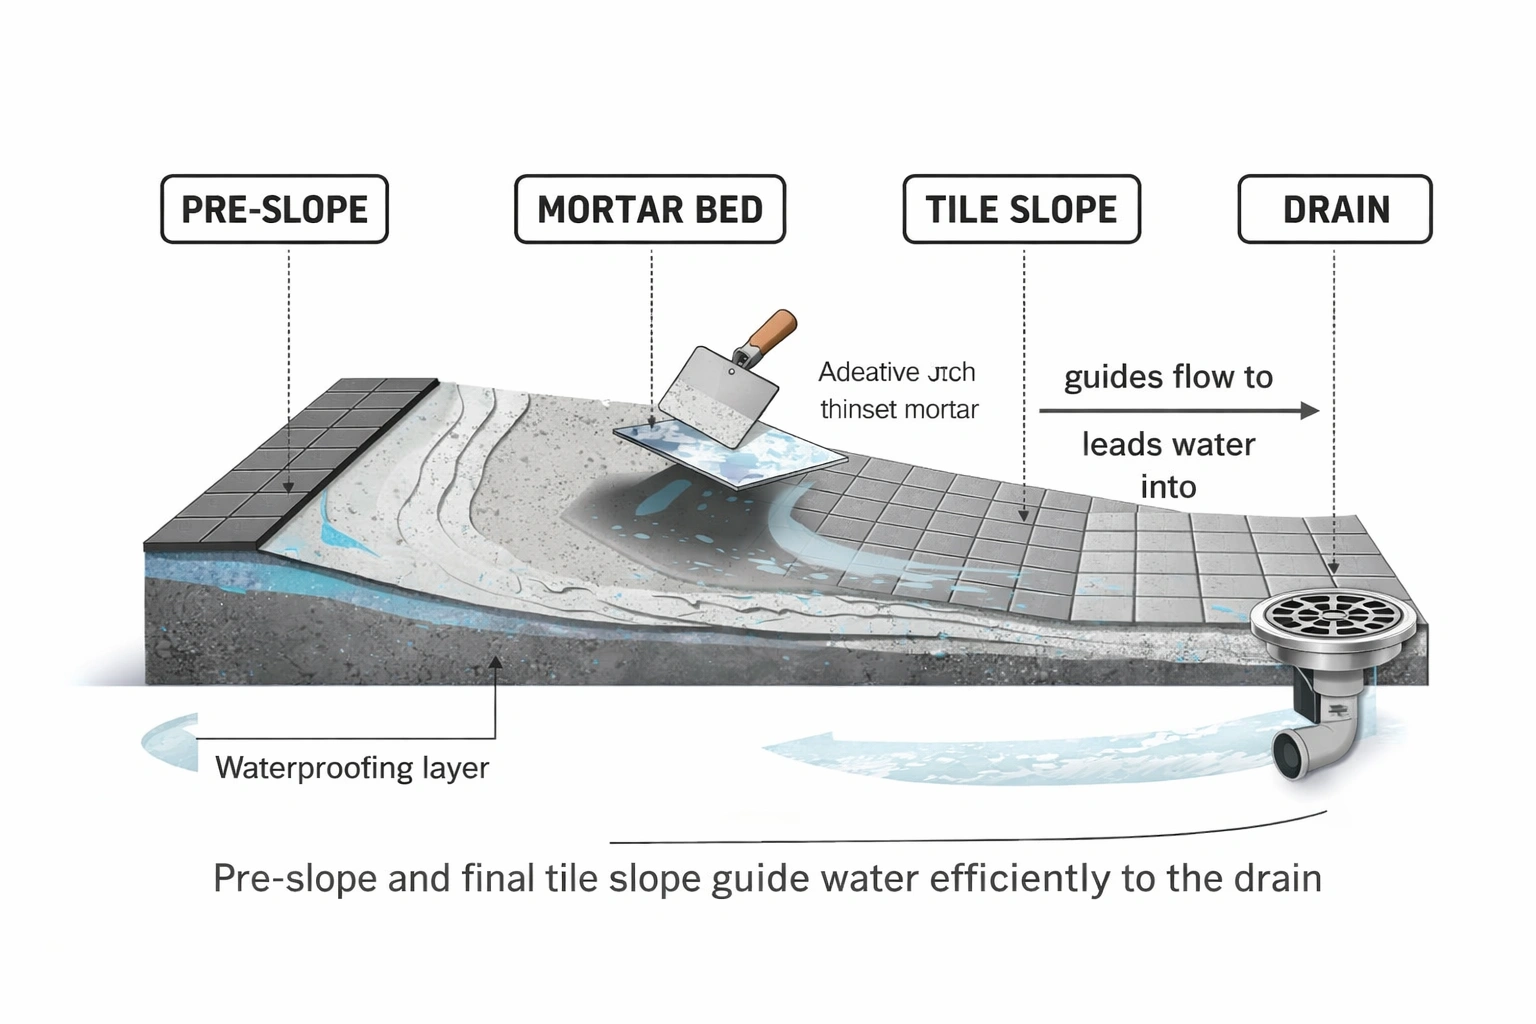
As you can see, both the pre-slope underneath and the final tile slope on top work as a team, guiding every drop of water where it needs to go. This dual-slope approach isn't just a nice-to-have; it's a non-negotiable part of a compliant and long-lasting shower. You can check out some modern bases that have these principles built right in our guide to walk-in shower base options.
The Finishing Touches: Grouting and Sealing
After the tiles are firmly in place and the adhesive has cured, it's time for grouting. Grout is more than just filler for the gaps. It’s what locks all the tiles together into a single, solid surface while also acting as another line of defence against water.
The type of grout used makes a big difference:
- Sanded Grout: This is the workhorse for most floors. It contains fine sand for extra strength and is used for wider grout lines (generally over 3mm).
- Unsanded Grout: With no sand, this grout has a much smoother finish. It's perfect for delicate tiles that could get scratched and for very tight grout joints (under 3mm).
- Epoxy Grout: This is the premium, bulletproof option for showers. It's completely non-porous, so it can't absorb water or stains. This makes it incredibly resistant to mould and mildew.
A professional tiler will take the time to pack the grout lines so they are completely full and consistent, with no pinholes or low spots. After the excess is wiped clean, the grout needs to cure properly, which can take up to 72 hours. Trying to use the shower before then is a common mistake that weakens the grout for good.
Finally, if a standard cement-based grout was used, the job isn't done until it's sealed. A quality penetrating sealer is applied, which soaks into the porous grout to create an invisible shield against water and stains. It’s a crucial final step to protect your beautiful new shower floor.
Budgeting Your Shower Floor Tile Project
Dreaming up a new tile floor for your shower is the fun part, but it's a realistic budget that turns those ideas into a stress-free reality. Getting a handle on the costs involved from the get-go saves you from nasty surprises. It allows you make smart calls on where to spend your money. The final bill isn't just about the tiles you see; it's a mix of materials, expert labour, and a few other things you might not have on your radar yet.
Think of it like a recipe. The tiles are your star ingredient, sure, but you also need the right adhesive, grout, and waterproofing to get the perfect result. And then you need the chef, the professional tiler and plumber, whose expertise makes sure it all comes together flawlessly.
Breaking Down The Costs
To nail your budget, you need to break the project down into three key parts: materials, labour, and those little extras that always pop up.
Each one is crucial to the final quality and cost of your shower renovation.
- Materials: This is where your costs can really swing. It covers the tiles themselves (anything from budget-friendly ceramics to luxe natural stone), waterproofing membranes, high-quality adhesive, grout, and sealant. Even the drain you pick, like a sleek linear drain versus a standard one, will shift the material costs.
- Labour: This is the one area you absolutely don't want to skimp on. Professional labour will include your tiler for the installation and likely a plumber to make sure the drain is properly installed and connected. Paying for a qualified pro is really an investment in a leak-free future.
- Contingency and Extras: Always, always set aside an extra 10-15% of your total budget for the unexpected. This buffer can cover things like ripping out old tiles and disposing of rubbish, fixing up a damaged subfloor, or other surprises you only discover once the demolition begins.
A solid budget looks at more than just the pretty tiles. Factoring in professional labour, proper waterproofing, and a contingency fund is the secret to getting your project done on time and without the financial headache.
What To Expect For Your Melbourne Renovation
For a professional job in Melbourne, you're looking at a cost somewhere between $150 and $300 per square metre. This figure usually covers the tiler's labour and basic installation materials, but not the cost of the tiles themselves. The final quote will depend on how complex the job is, the type of tile floor for shower you’ve chosen, and the state of your existing bathroom.
The good news is that top-quality materials are more affordable than ever. Australia's ceramic tiles market recently hit a massive USD 1,784.00 million, thanks to a boom in home renovations and construction. With many tiles being imported, the average prices are pretty competitive, which makes a durable and stylish shower floor a realistic goal for a lot of Melbourne homeowners. You can dive deeper into the Australian ceramic tile market trends to see how this impacts local pricing.
The last piece of the puzzle is time. A standard shower floor replacement usually takes about 3 to 7 days. This timeline allows for the crucial drying and curing times needed for the screed, waterproofing membrane, and grout. Rushing these steps is a surefire way to end up with problems. So make sure you plan for your bathroom to be out of action for at least a week to get a result that's built to last.
Got Questions About Shower Floor Tiles? We've Got Answers.
Any renovation project is going to come with a lot of questions. When it comes to something as crucial as a tile floor for your shower, it’s always smart to get the answers you need before you even think about starting. We hear these questions all the time from Melbourne homeowners, so we’ve put together some clear, straightforward advice to help you move forward with confidence.
Getting into the nitty-gritty of materials and installation can be the difference between a shower you absolutely love and one that becomes a constant headache. Let's clear up some of the most important points.
What Is The Best Grout To Use For A Shower Floor?
If you're looking for the best of the best, epoxy grout is the only way to go. Unlike the old-school cement grout you might be used to, epoxy is completely non-porous. That means it doesn’t soak up water, making it incredibly resistant to stains, mould, and mildew. It’s a game-changer for long-term cleaning and maintenance.
Now, it does cost a bit more upfront, and you'll need a pro to install it because it sets incredibly fast. But the long-term benefits of not having to scrub mouldy grout lines are well worth it for many. If epoxy isn't in the budget, your next best bet is a high-quality, polymer-modified sanded cement grout that is properly sealed.
Can I Use Large Tiles On My Shower Floor?
Absolutely, but it takes some careful planning. The big challenge with large-format tiles is getting the slope right so the water actually drains away. If you have a standard drain right in the centre of the shower, the floor needs to slope down from all four directions. Trying to do this with big tiles without making a mess of cuts is a tiler's nightmare.
This is where a linear or channel drain comes in. These long, slim drains are usually set against one wall. This brilliant design allows the entire shower floor to have a single, gentle slope in one direction. It gives you that clean, seamless look with hardly any grout lines and makes using large tiles a breeze. Just make sure your tiler has experience installing them in wet areas.
How Often Do I Need To Reseal My Shower?
This all comes down to the materials you've chosen. If you went with porcelain or ceramic tiles paired with epoxy grout, the great news is you will likely never need to seal them. That combination creates a surface that’s pretty much bulletproof and maintenance-free.
However, if you've got cement-based grout, you'll need to reseal it every 1-2 years to keep it from absorbing water and getting stained. For natural stone tiles like marble or travertine, both the tile and the grout need sealing right after installation and then topped up periodically. Usually every 6-12 months, depending on how much the shower is used.
Here’s a quick tip: you can do a simple water test to see if it’s time to reseal. Splash some water onto the grout or stone. If it beads up on the surface, your sealer is still doing its job. If it soaks in and darkens the material, it's time to reapply.
What Is The Most Important Factor When Choosing Shower Floor Tile?
Looks are important, of course, but the single most critical factor for a shower floor is slip resistance. A shower is, by its very nature, a wet and slippery place. The tile you choose absolutely must provide enough grip to prevent dangerous falls and injuries.
In Australia, you should be looking for tiles with a slip rating of at least R10. This rating tells you how well the tile performed on a wet, angled ramp test. As a general rule, a tile with a textured or matte finish will always offer better grip than something smooth and polished. Getting this right means your shower will be both beautiful and safe for everyone who uses it.
Planning a bathroom renovation can feel like a huge task, but you don't have to figure it all out on your own. The team at Smarter Home Renovations has over 20 years of experience delivering stunning, durable, and fully compliant bathroom projects across Melbourne.
For expert advice you can trust and a transparent quote on your project, contact us today.